User Guide / Adding labels to shapefile layers
Adding labels to shapefile layers
Guide
Labelling features on a map makes it easier to quickly understand the information presented and communicate the most important aspects of your projects.
The new Label tool in Equator allows you to add labels, easily format them, and supplement them with your own text.
You may want to add labels for geographic reference points such as land or water features. You have full control over which features to label, so you can ensure your maps are focused. In the example below, we will add a contour layer and add labels to it to show elevation. This will allow any viewers to quickly understand the topography of the area at a glance.
Add a shapefile layer
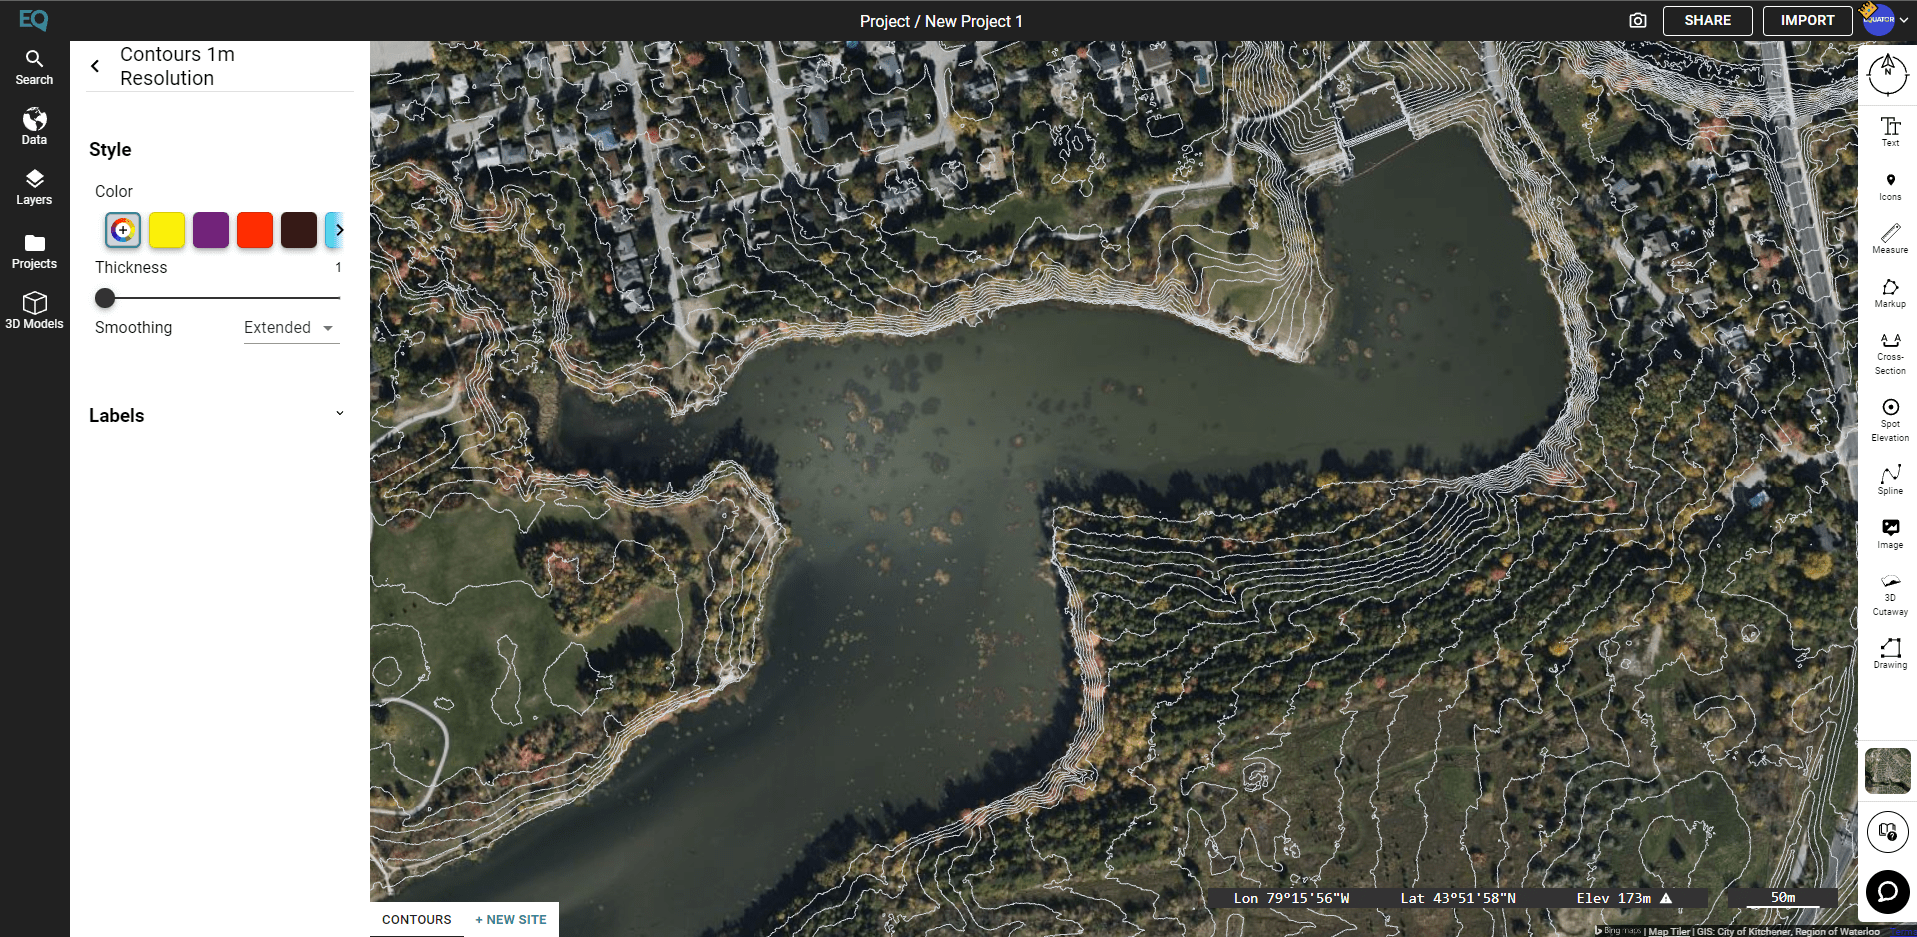
Load a shapefile layer on to your map. Remember to adjust colors and opacity to make everything show up clearly. Here, we will choose a very light grey for the contours, to contrast the dark greens on the base layer.

Edit the label text
Select the layer you would like to add labels to in the Layer menu, and open the Labels drop down menu.
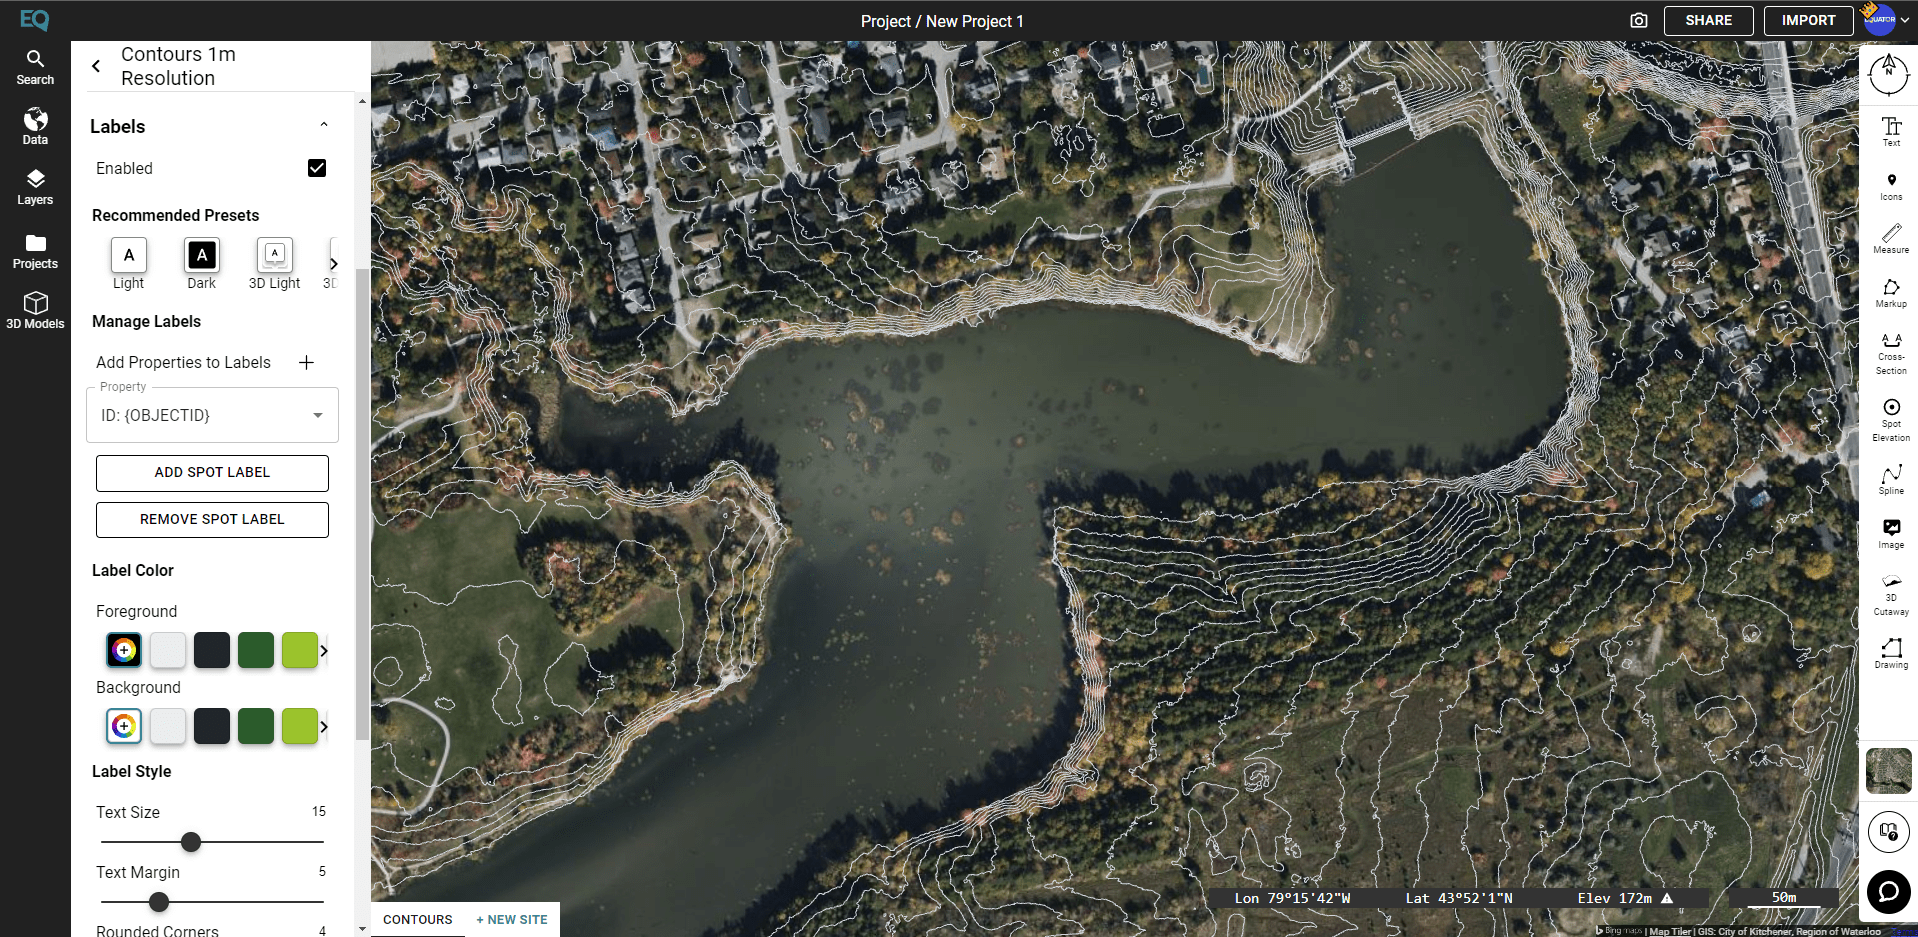
In the Labelling menu, select the checkbox to make labels visible. Once the label visibility has been enabled, you will see your label formatting tools.
The first dropdown box lists all of the attributes of each feature. In this case, the dropdown shows us that each contour has an “ID” and a “elevation”. Select “elevation” from the dropdown.
By default, the text for the label includes the name of the attribute and a placeholder for the value of the attribute.
In this example, the dropdown reads ID: {OBJECTID}.
The attribute is between the brackets { … }, you can edit any of the text surrounding that.
In this case, we want to add the unit of measurement for the elevation, to show that the elevation is in meters.

Adjust formatting
Now you’re ready to add labels to your map.
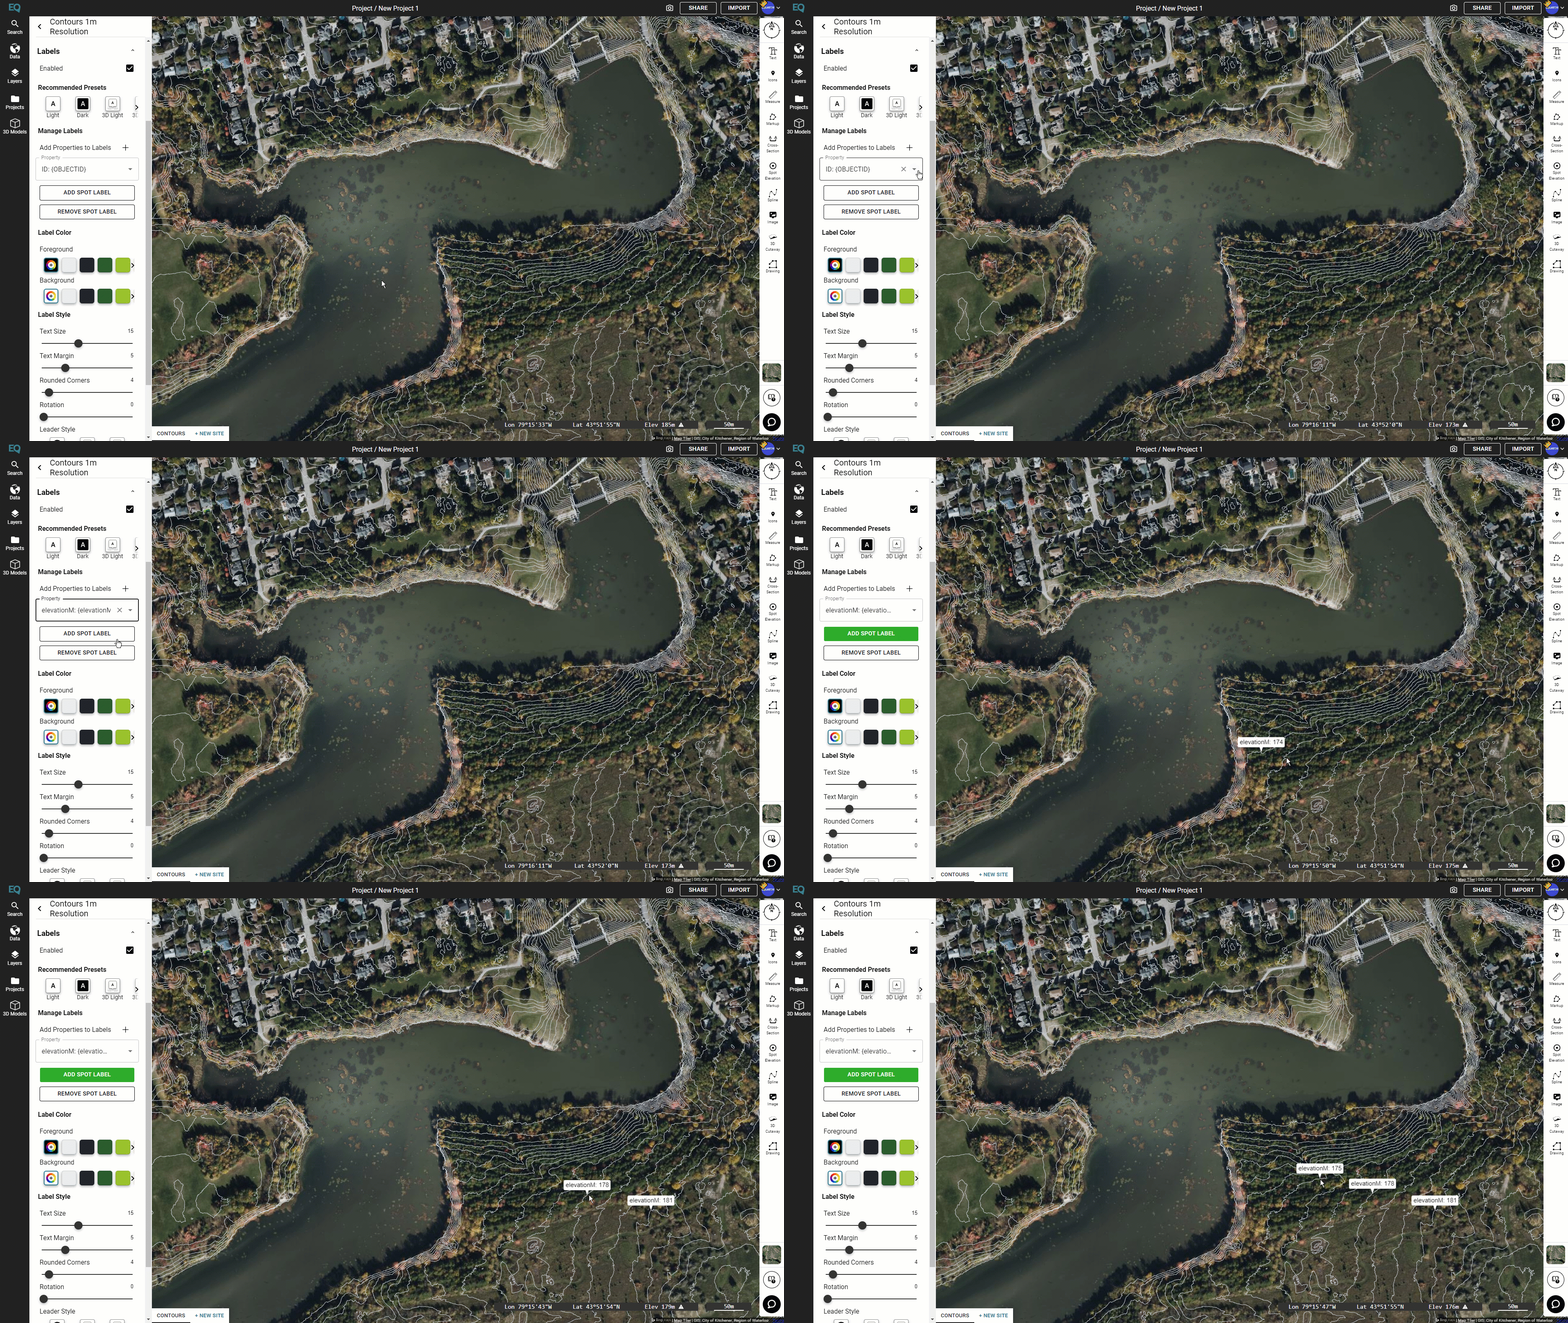
Select the “Add Spot Label” button, and move your cursor to the map space. As you move your cursor around the map, you will see the labels that correspond to the feature you are near.
Left click to place a label on a feature.
You can add as many labels as you’d like. Once you’re done, click the “Add Spot Label” button again to toggle it off.

Fine tune your labels
As your map evolves, you might find that you want to get rid of some labels, add more information to your labels, or turn the labels off while you work.
Delete Labels
You can delete individual labels by selecting the “Remove Spot Label” button and clicking on the ones you want to remove.
Create a multiline label
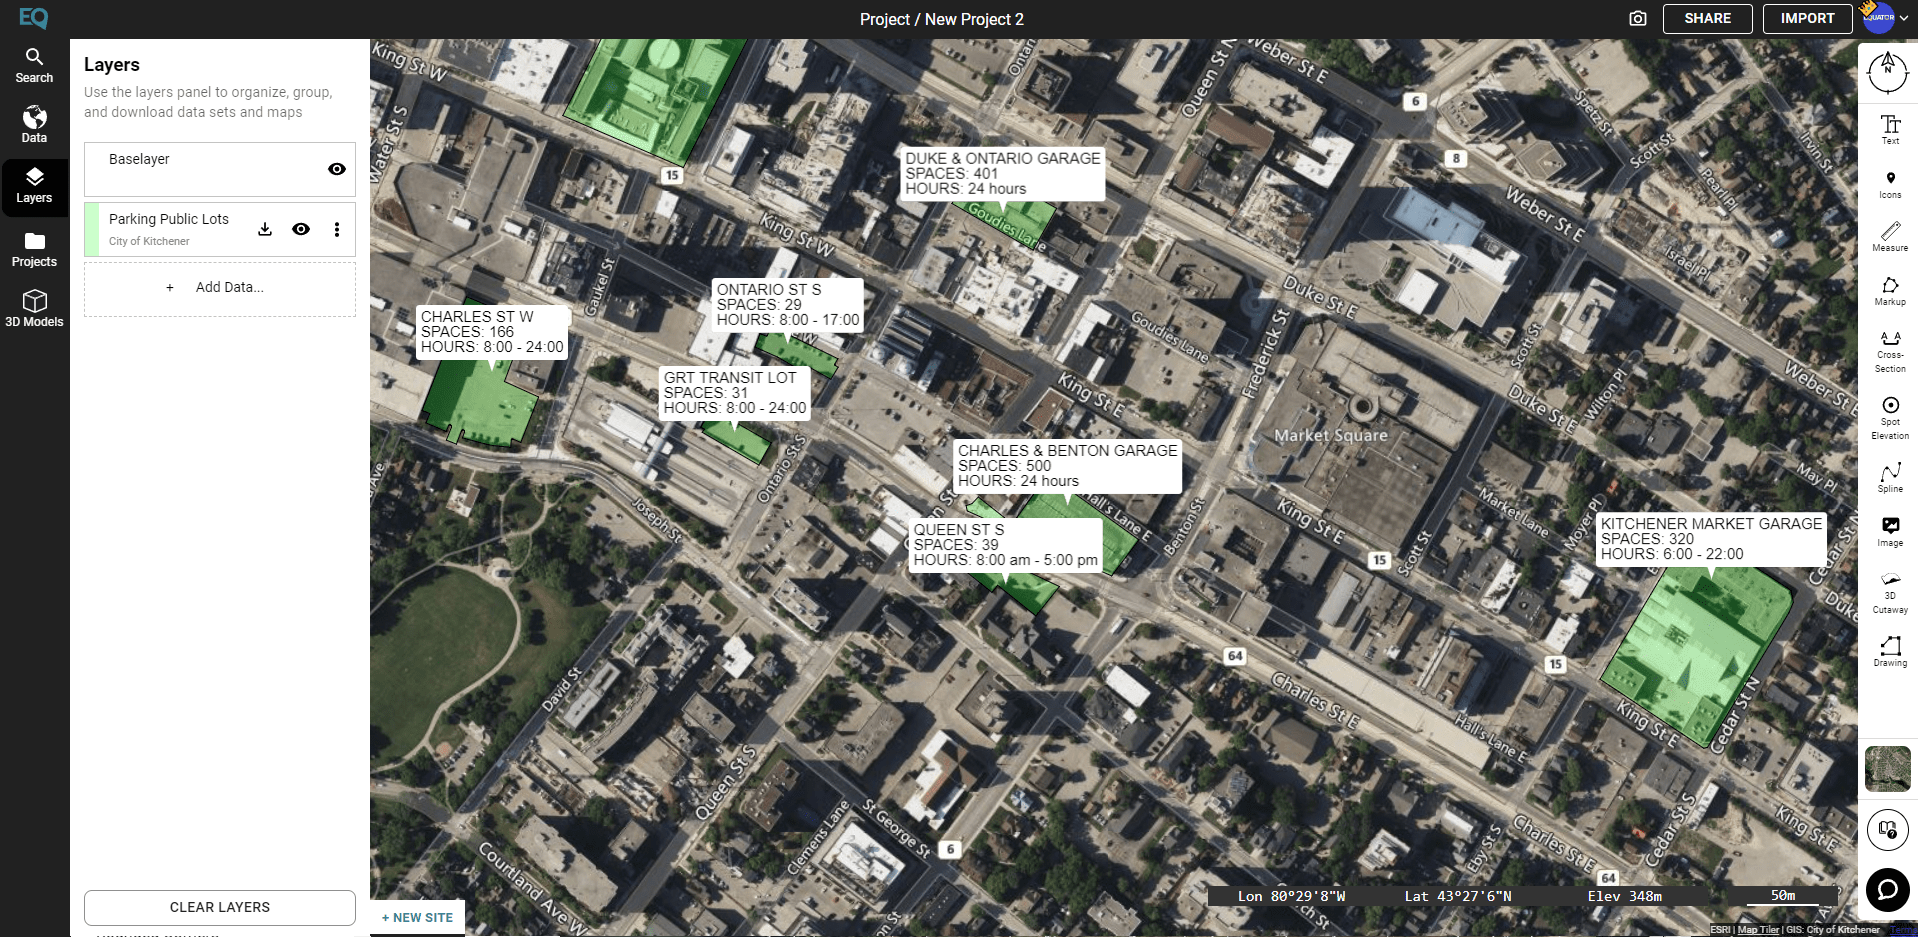
You can create a label with multiple lines if your layer has lots of information. Select the “Add Property” option, then select the attribute you want to add. You can also add your own text here, without selecting an attribute.
In the example below, parking lots are labeled with the name of the lot, the number of spaces and the hours of operation.

Turn label visibility off
If you don’t need your labels, but are happy with the formatting of them, you can turn the visibility off. When you turn it back on, all of your formatting and spot labels will reappear.