User Guide / How to create a Civil 3D surface from a contour shapefile?
How to create a Civil 3D surface from a contour shapefile?
Video Overview
For this tutorial we use high-quality contours made in Equator.
Step 1:
In the “Home” menu, click on the “Surface” drop down menu and choose “Create Surface from GIS Data.”
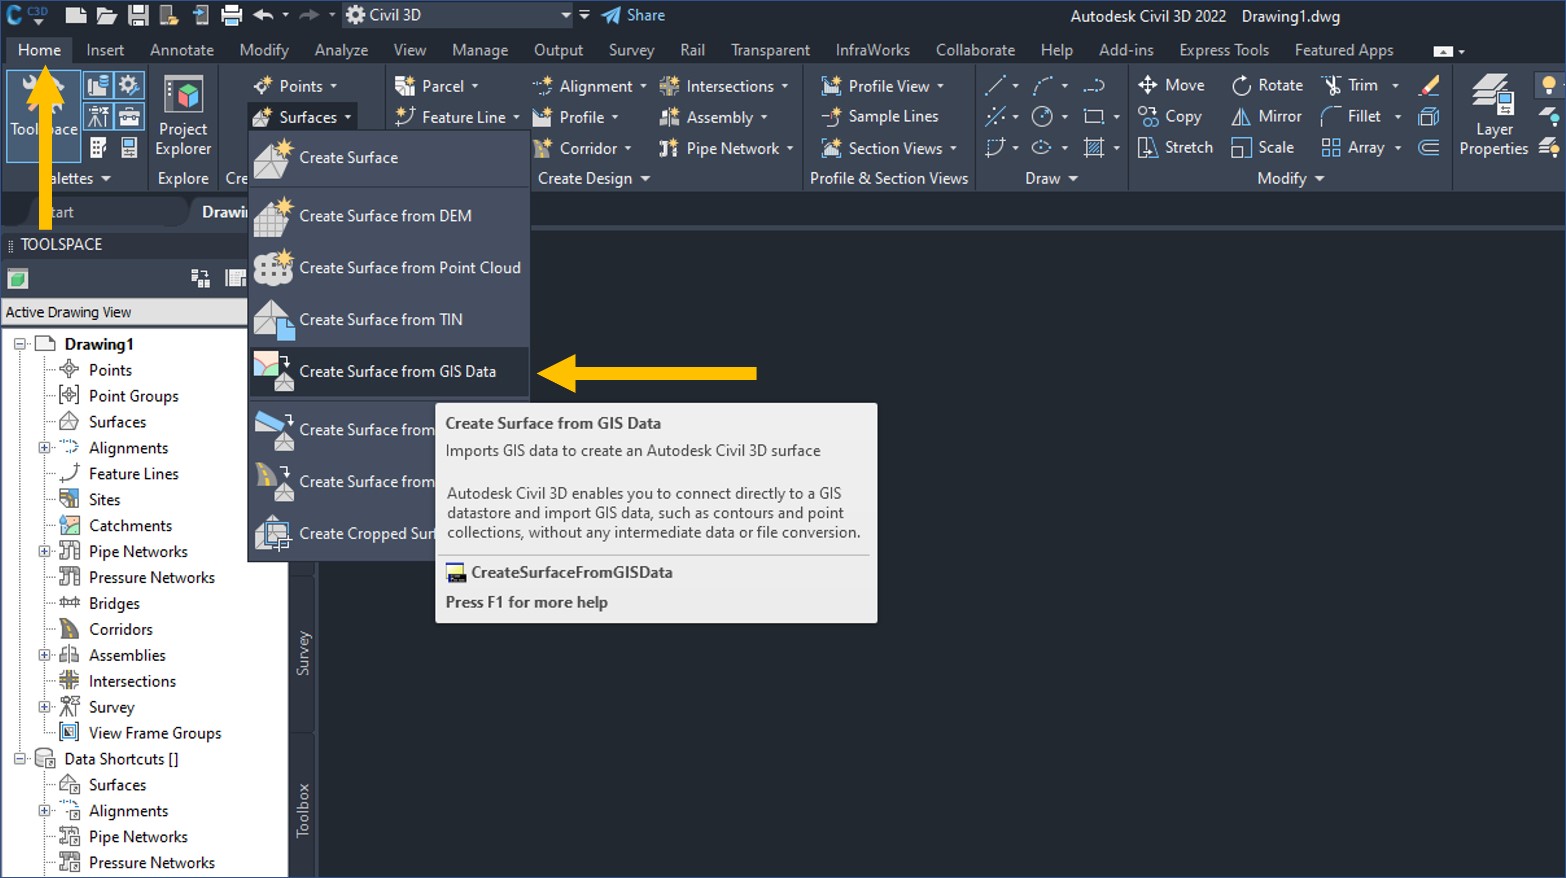
Step 2:
Under “Object Options” give your surface a name, description (optional), style and assign it to a layer. You can always change these settings after, so don’t worry too much about them when you are starting out. When you are finished, click on “Connect to Data.”
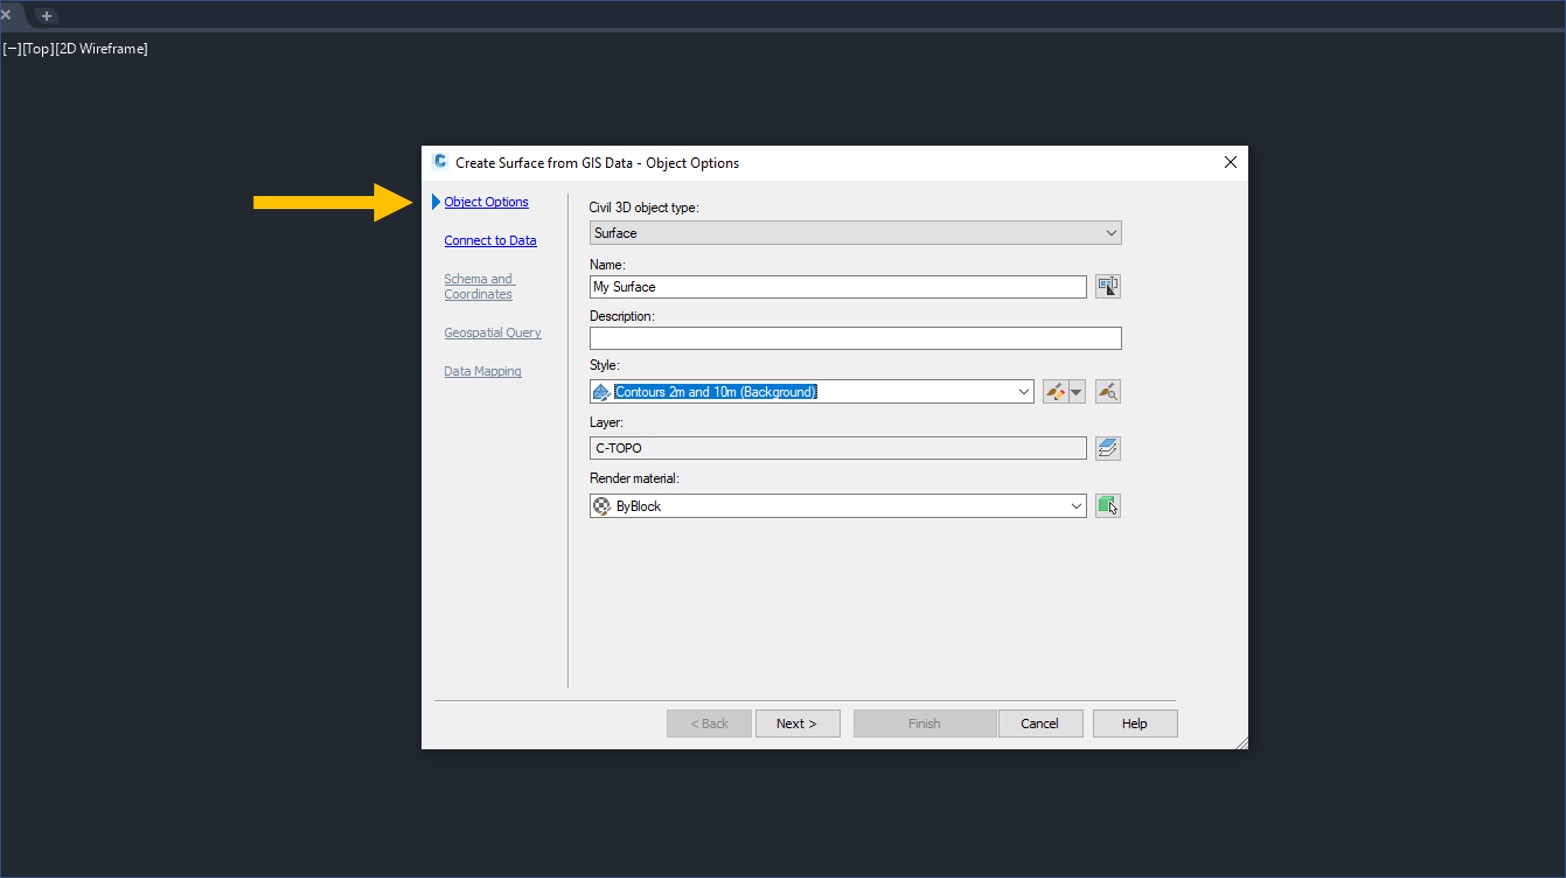
Step 3:
Under “Connect to Data,” select “SHP” to indicate that you want to connect to a shapefile. Click on the three dots beside the SHP path and navigate to the location of your shapefile. Once the file has been selected, click on “login.”
In this process, we are connecting to a shapefile on our desktop so there is no requirement to actually login, but for some reason this step is required to move forward.
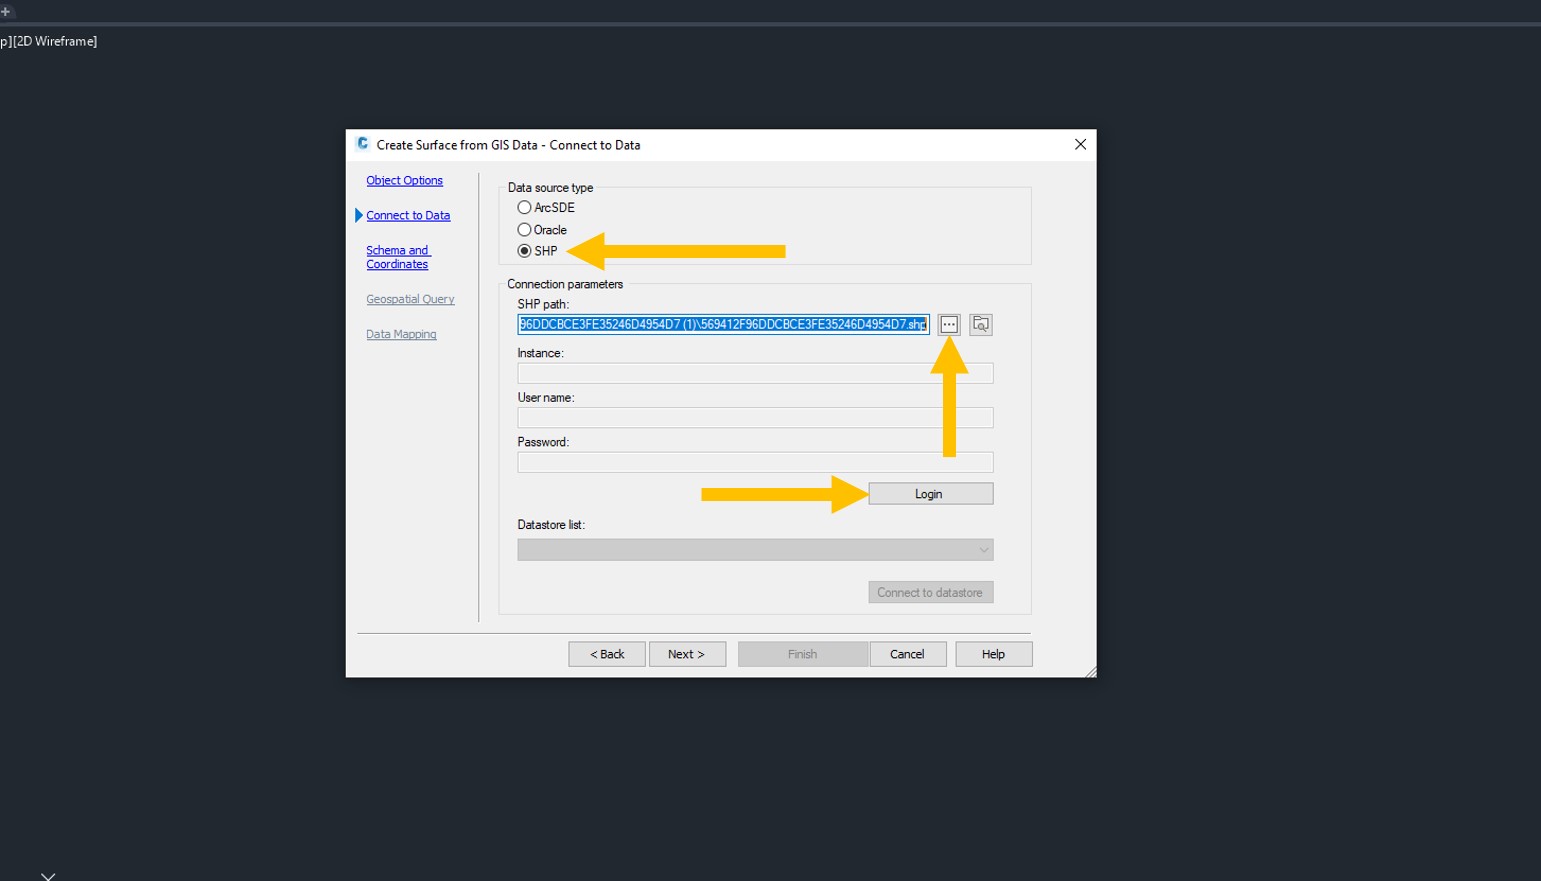
Step 4:
Under “Schema and Coordinates,” select the check box beside the shapefile you want to connect to. Check to see if your shapefile contains a coordinate system. In this example, the coordinate system that the shapefile is in is WGS84. This coordinate system does not need to match your drawing coordinate system, so do not change this value if it is automatically populated.
Next, check to see if your drawing has a coordinate system assigned to it. You will want to make sure this is done before connecting to GIS data. In this example, there is “No Datum, No Projection” assigned, so one needs to be set up.
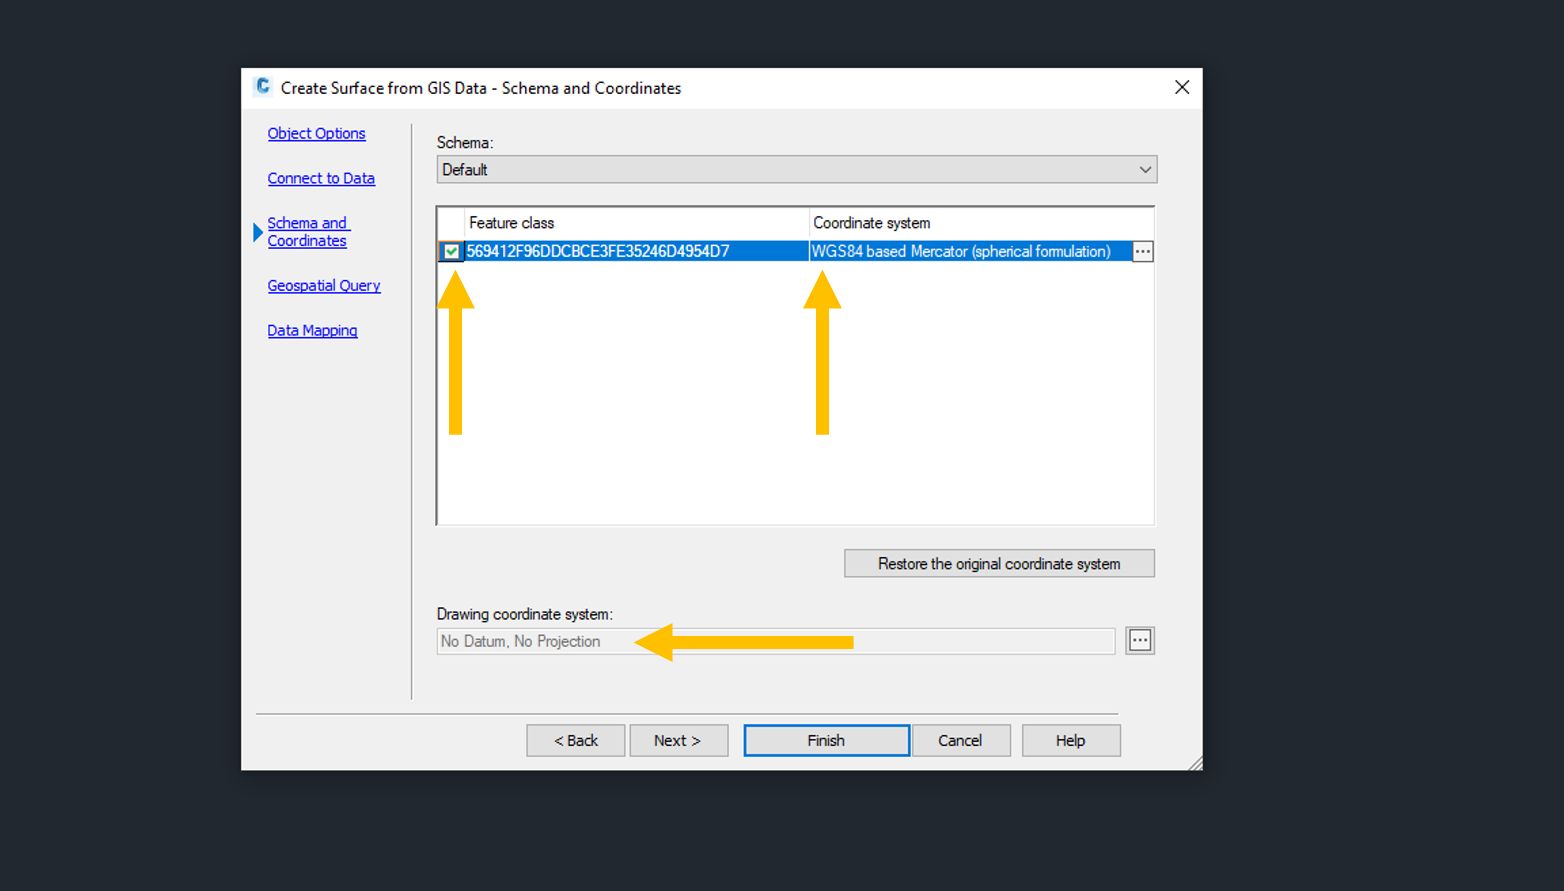
Step 5:
Skip over “Geospatial Query” and select “Data Mapping.” Here, at minimum, you need to make sure that the “elevation” property in Civil 3D matches the right elevation property in the shapefile.
Once you finish mapping the shapefile properties to Civil 3D properties, click on “Finish.”
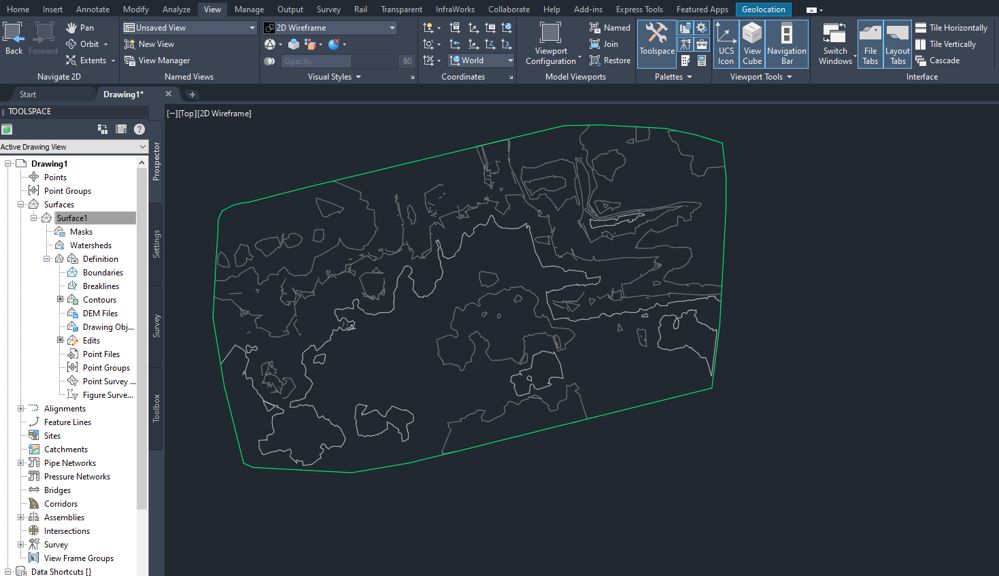
Tip: You can use the command “zoom” [enter] and then “ex” [enter] to zoom to the extent of the surface that has been created.
You now have a surface created from a contour shapefile!
Quick Tip:
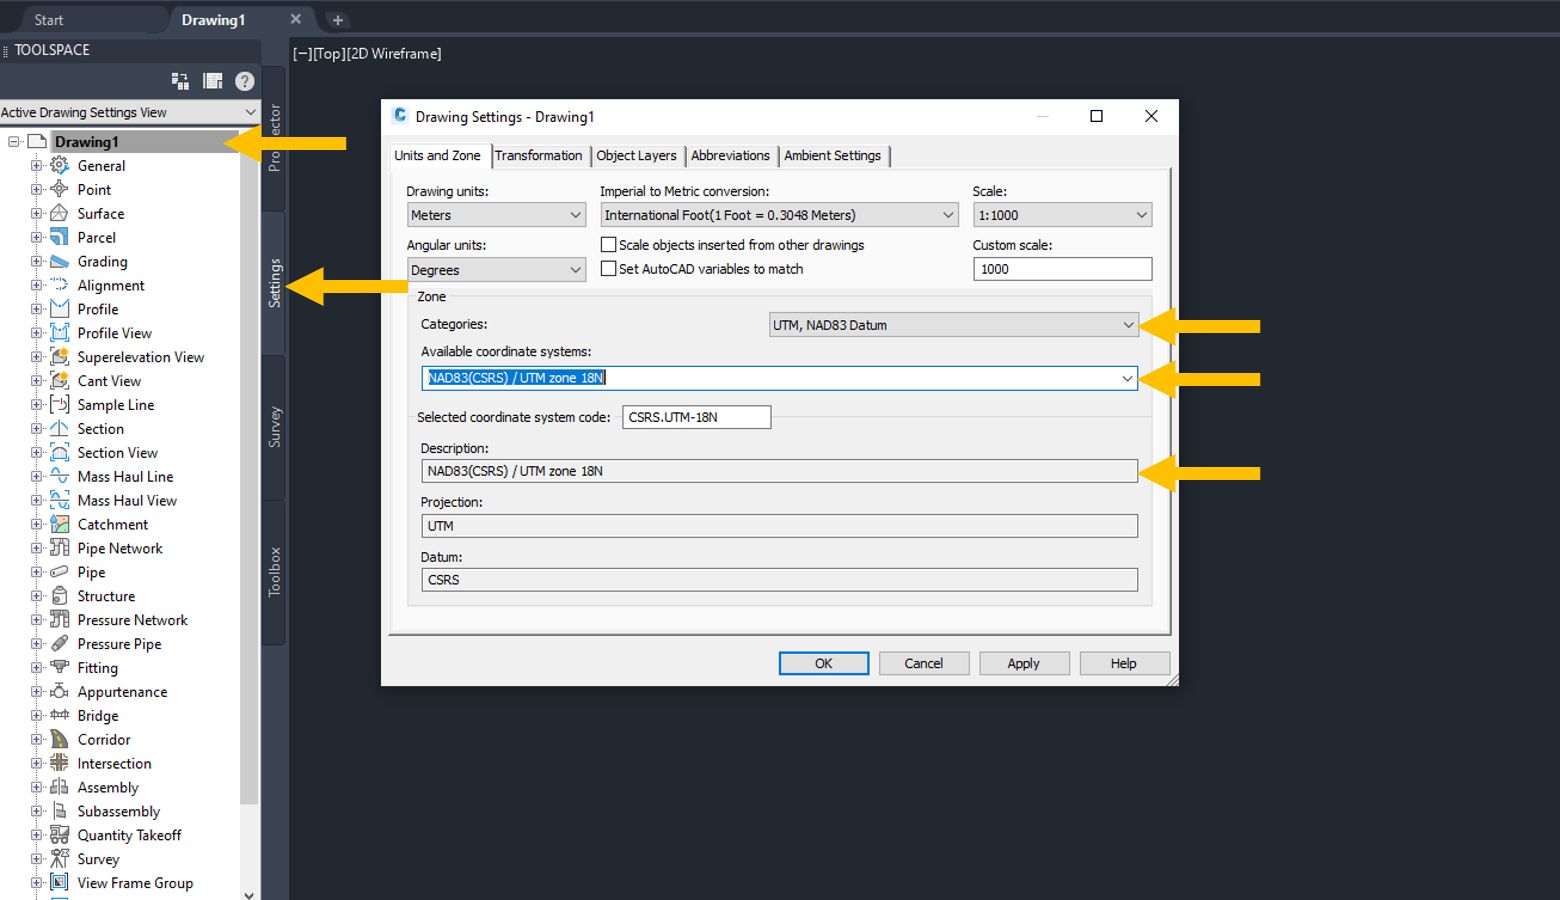
The coordinate system of the drawing file can be set up in the “Toolspace.” Click on “Settings,” right-click on the drawing name (“Drawing1”) and click on “Edit Drawing Settings.”
Here, you can select the right coordinate system for your project.
Where can I find elevation data?
Once you have figured out what kind of surface is required for your Civil 3D project, you will likely need to source elevation data. Equator provides access to the highest-resolution elevation data online. We save users days or weeks of ground-based surveys or searching through GIS databases. Using Equator, you will have immediate access to billions of super-accurate elevation points, and the ability to export data for use in Civil 3D.
Equator provides on-demand access to :
- LiDAR point clouds
- Digital elevation models (DEMs in geoTIFF format)
- Digital surface models (DSMs in geoTIFF format)
- Contours (shapefile and dxf format)
Click on the link below to start extracting survey data right now.