User Guide / LiDAR vs DEM vs Contours?
LiDAR vs DEM vs Contours?
Avoid throwing away data and start building smarter surfaces
Key Terms
LiDAR: “Light Detection and Ranging,” a remote sensing method of 3D laser scanning technology that can be used to create a digital representation of the earth’s surface.
Point Cloud: A set of points in space with X, Y, and Z coordinates. LiDAR technology is used to create a point cloud. Often point clouds are stored in LAZ or LAS format.
LiDAR-Derived: Typically, an elevation data product that is created from a LiDAR point cloud.
LiDAR-Derived Digital Elevation Model (DEM): A DEM is a digital representation of elevation data (such as the earth’s surface). Often DEMs are stored in an image (raster) format, such as TIFF. A raster based DEM includes a grid of regularly spaced elevation values that represent the ground surface, created from LiDAR point cloud data.
Contours: Polylines that connect points of equal elevation. Contours are often created from elevation models, like DEMs. They can be stored in vector formats such as SHP, DXF, GeoJSON, CSV, etc.
It starts with a LiDAR point cloud
It is important to understand the source of any elevation data you decide to use. Elevation data can be created in a variety of ways; from ground based land survey to remote sensing systems, with each source of data having their own unique opportunities and limitations.
In this article, we will be discussing one source of elevation data: airborne lidar. Specifically, point cloud data collected in-flight using lidar scanners mounted on aircraft. This mode of elevation data collection is becoming increasingly popular among government agencies for a variety of reasons. In particular, it is a cost effective way to collect high-resolution information about the earth’s surface over large geographic areas.
Before collecting airborne lidar data, an organization will determine which data specifications they require such as the non-vegetated vertical accuracy (NVA) or the laser pulse density. This allows an organization to control the quality of the end-product. Today, publicly available airborne lidar collected in Canada and the United States typically ranges in NVA from 5 cm to 30 cm.
After a lidar point cloud is collected, it is often referred to as “raw” data. The raw data is then cleaned-up and processed into a more useful product for end-users. This product is typically a “classified point cloud” in which each of the points is assigned a classification (ground, water, bridge, vegetation, etc.).
For an end-user, like an architect, engineer or designer, the classified point cloud is often the best, highest-resolution elevation data they will be able to find online.
The images below shows a classified point cloud sourced from the United States Geological Survey (LA Sabine River LiDAR, 2018), accessed through Equator. The image on the left shows all point cloud classifications and the image on the right shows ground only points. As you can see, in the image on the left, trees, hydro lines, and even cars are visible!
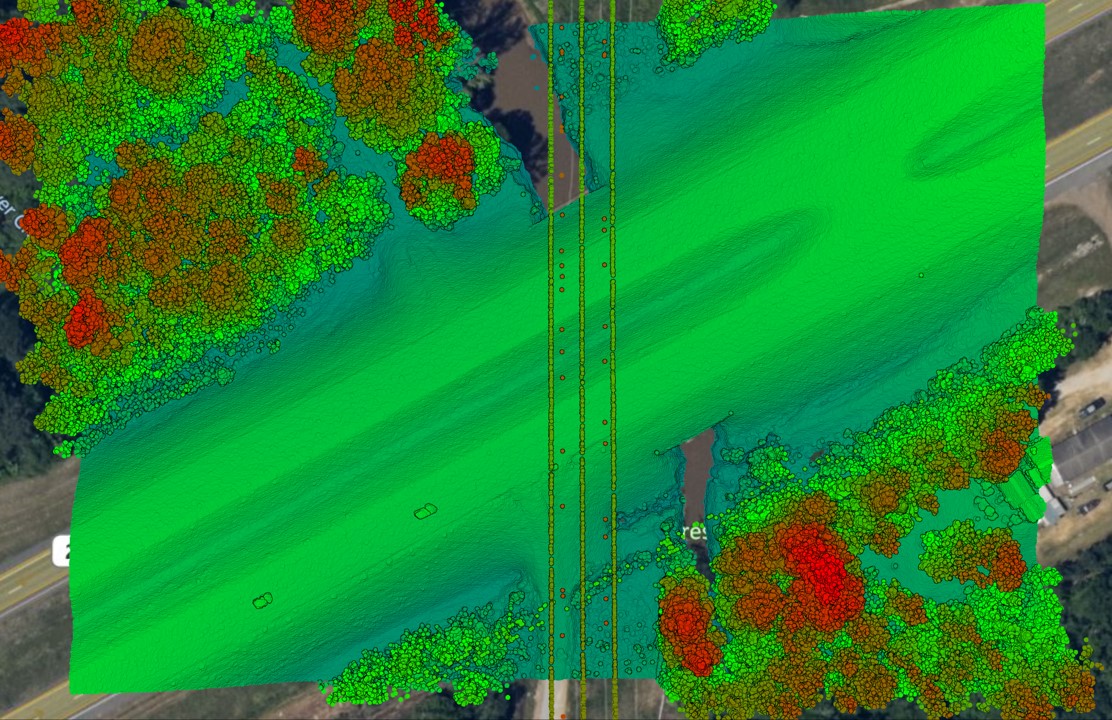
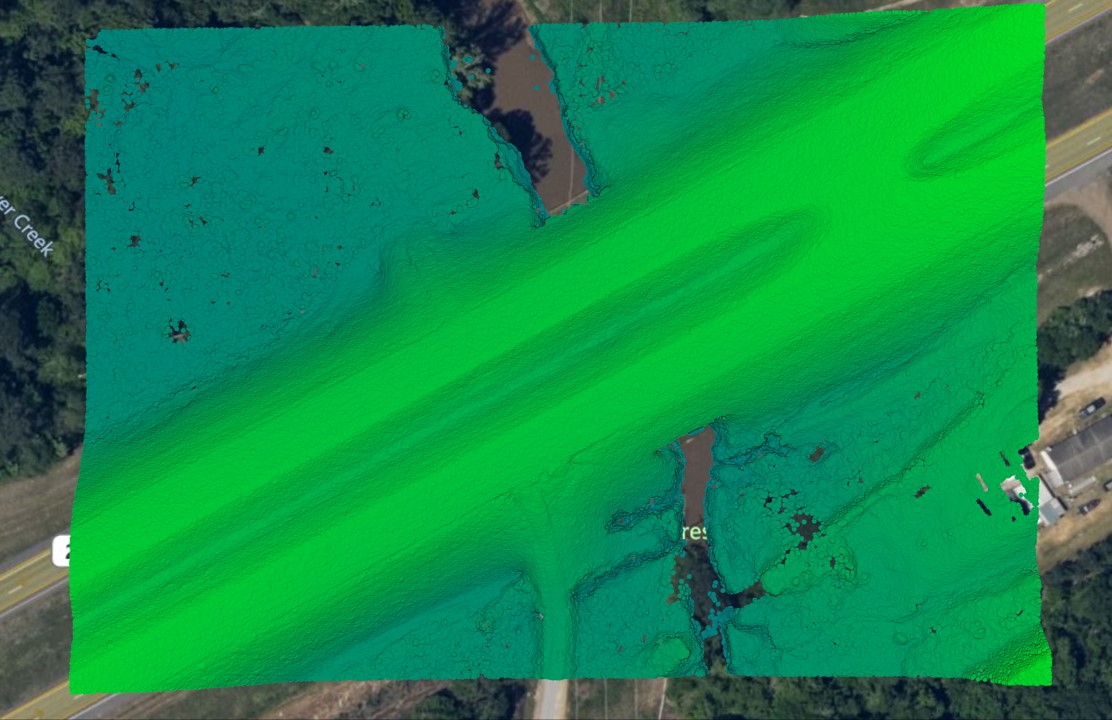
(left) Classified point cloud including all classifications, (right) classified lidar point cloud showing ground only classified points. Data source: United States Geological Survey (LA Sabine River LiDAR, 2018), accessed through Equator.
The data conversion process (aka where data quality might be lost)
When a professional is looking for elevation data, it is often because they have an end project in mind: design a new road, assess the drainage patterns of an area and so on. These projects may require software or solutions that are not directly compatible with lidar point cloud data. So the next questions are often:
How do I import a lidar point cloud into _____________?
or,
How do I convert a lidar point cloud into _______ format?
While these questions are good to ask, they are not necessarily the best place to start. This is because they assume one method or procedure without a consideration of the range of needs for the project or end-result. In doing so, data often gets rounded or averaged in lossy conversion processes, and cannot be recovered as the project progresses.
A better question to ask: “What is the maximum amount of data that I can retain, that also meets the needs of my end-solution and applications?”
The images below demonstrate the result of data loss through the conversion process. The two images below were created from the exact same lidar point cloud. In the image on the left, a surface model was created in Civil 3D from 1 m contours. For visualization purposes, 0.5 m contour intervals were turned on. In the image on the right, a surface model was created in Civil 3D from from a 1 m DEM. Again, for visualization purposes, 0.5 m contour intervals were turned on.
As you can see, the resulting contours are quite different. The contours on the left are jagged and inaccurate in some spots. While on the right, the contours are smooth and more reflective of the actual ground surface.
So why the difference?
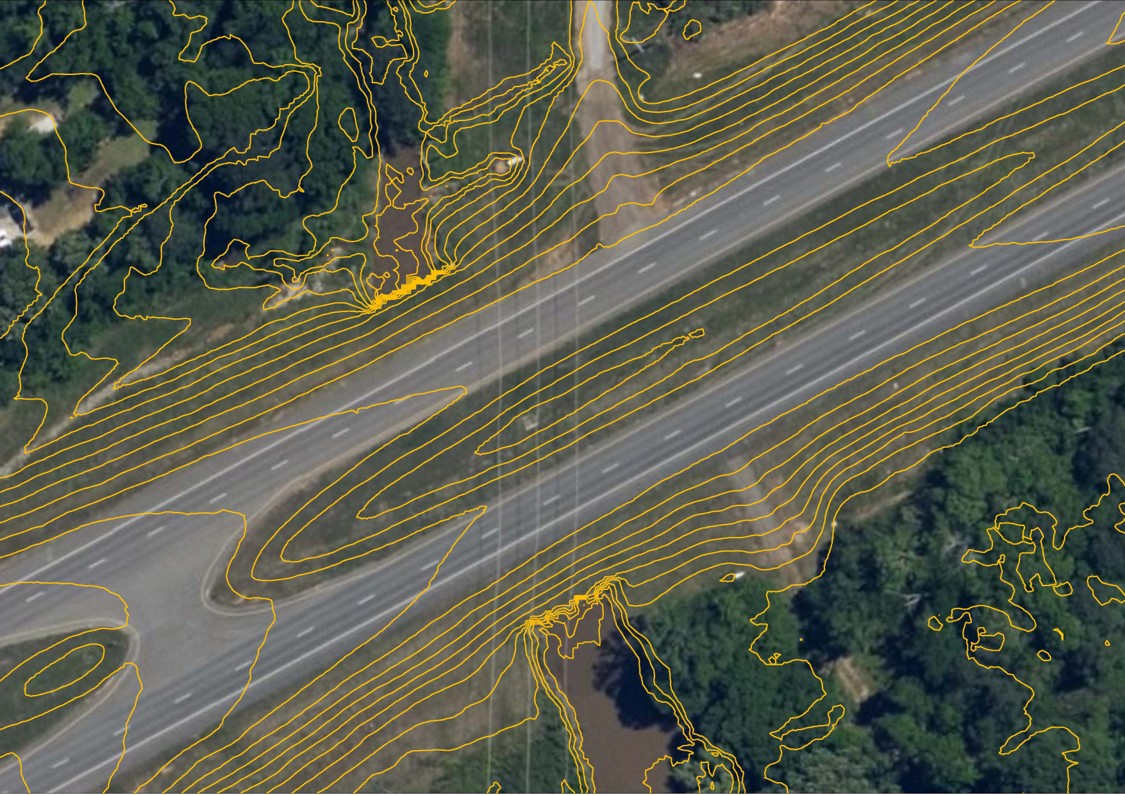
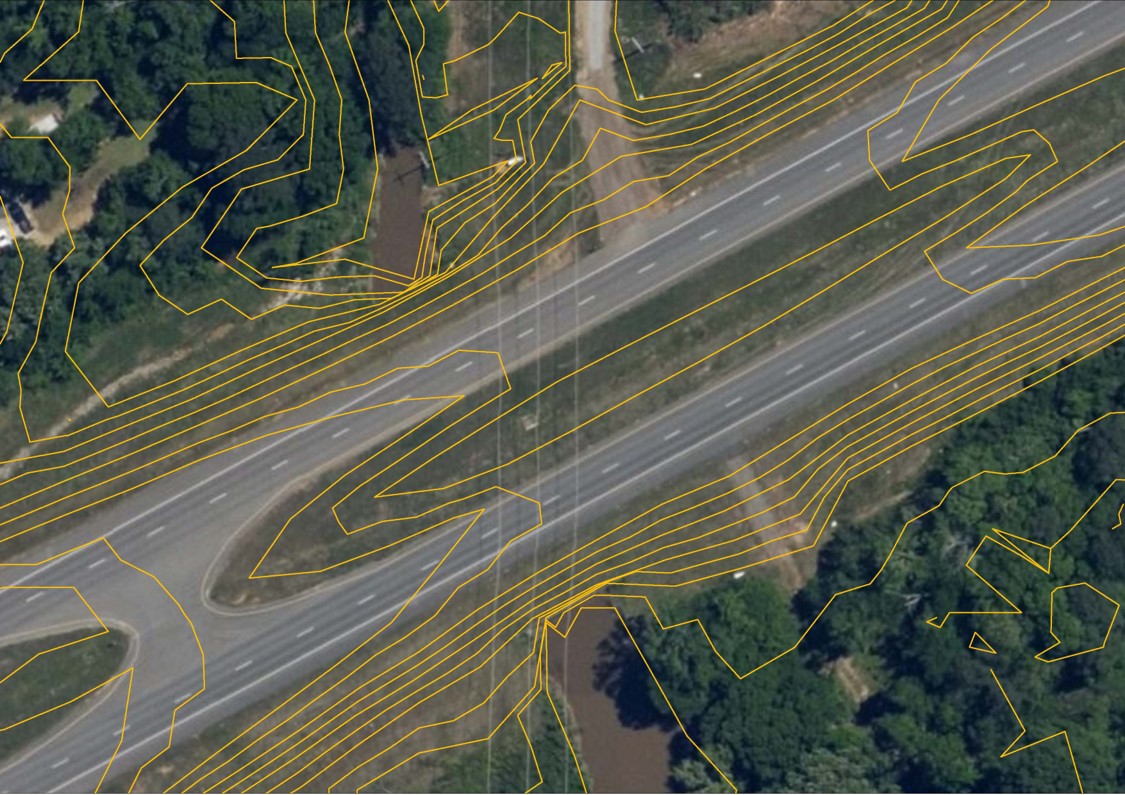
(left) A Civil 3D surface created from a 1m resolution DEM, visualized as 0.5m contours, (right) A Civil 3D surface created from a 1m resolution contour shapefile, visualized as 0.5m contours. Data source: United States Geological Survey (LA Sabine River LiDAR, 2018), accessed through Equator.
1 m DEM > 1 m Contours
It may be tempting to think that a DEM with a 1 m resolution contains the same amount of information as contours at a 1 m interval, but this is not the case!
A DEM is a grid of regularly spaced elevation values. For a 1 m resolution DEM, every 1 m x 1 m box contains an elevation. There are no holes, gaps or irregular spaces between values, it is one smooth surface.
In contrast, contours are polylines that connect points of equal elevation. There are lines that contain data, and then gaps with no data in between. This means, that if there is a wide gap in between lines, there is no information being saved in that area.
Contour lines are often generated from DEMs, but the problem is that often the source DEM is thrown away afterwards.
If you want to create a smooth surface, consistent surface model, a DEM is a great place to start.
The resolution of a DEM can be adjusted based on the source data quality and end-user’s needs. The images below show a comparison between a 0.1 m resolution DEM (left) and a 1 m DEM (right).
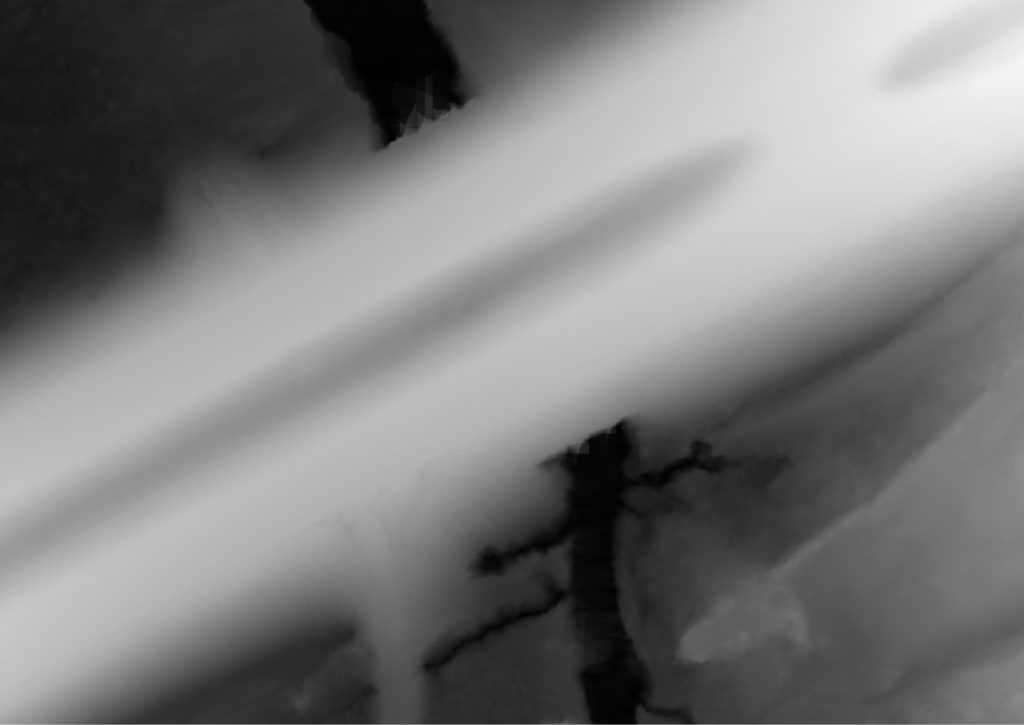
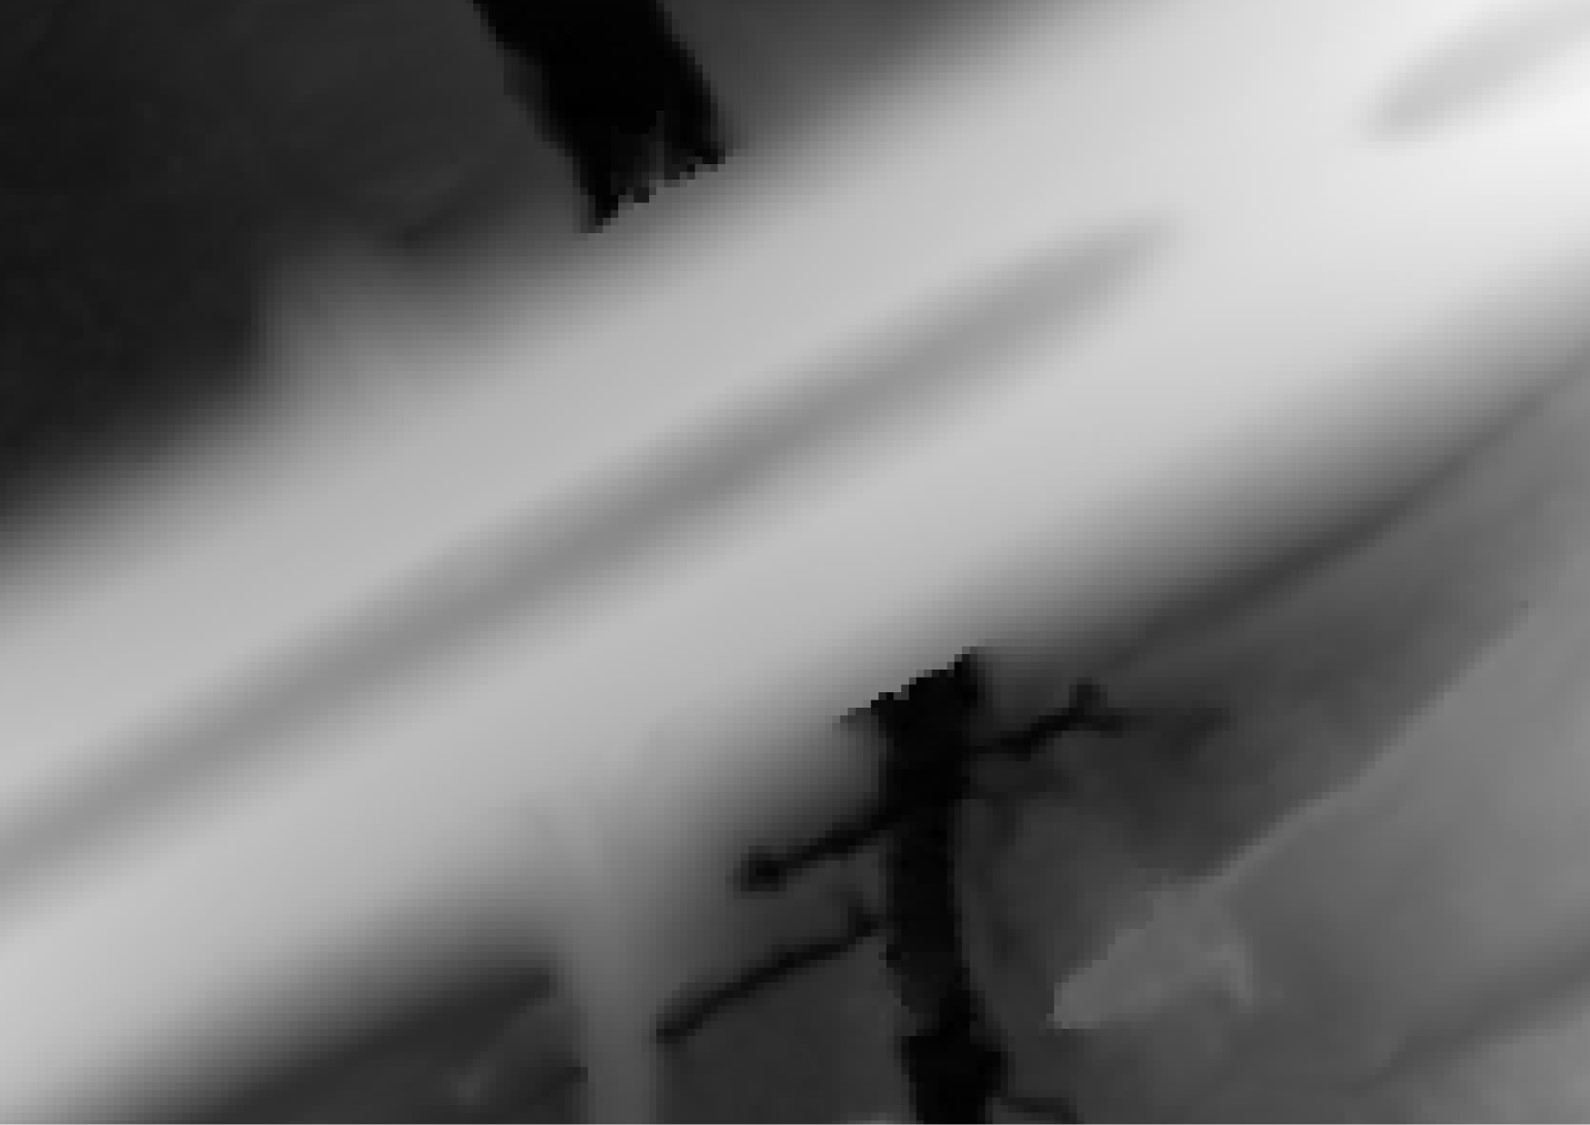
(left) A 0.1 m resolution DEM (right) A 1 m resolution DEM. Data source: United States Geological Survey (LA Sabine River LiDAR, 2018), accessed through Equator.
Civil 3D Context
AutoDesk Civil 3D is one of the most popular design tools used by civil engineers and designers. Although Civil 3D offers unparalleled professional customization, there are still some challenges that users face when building 3D surfaces. Specifically:
- Building surfaces from large data sets (for example, a surface with more than a million points)
- Creating a surface from different types of source data (for example, a combination of DEM and point files)
When creating surfaces from different types of data, it is important to consider how the source data was created and consider how that might fit into the project as a whole.
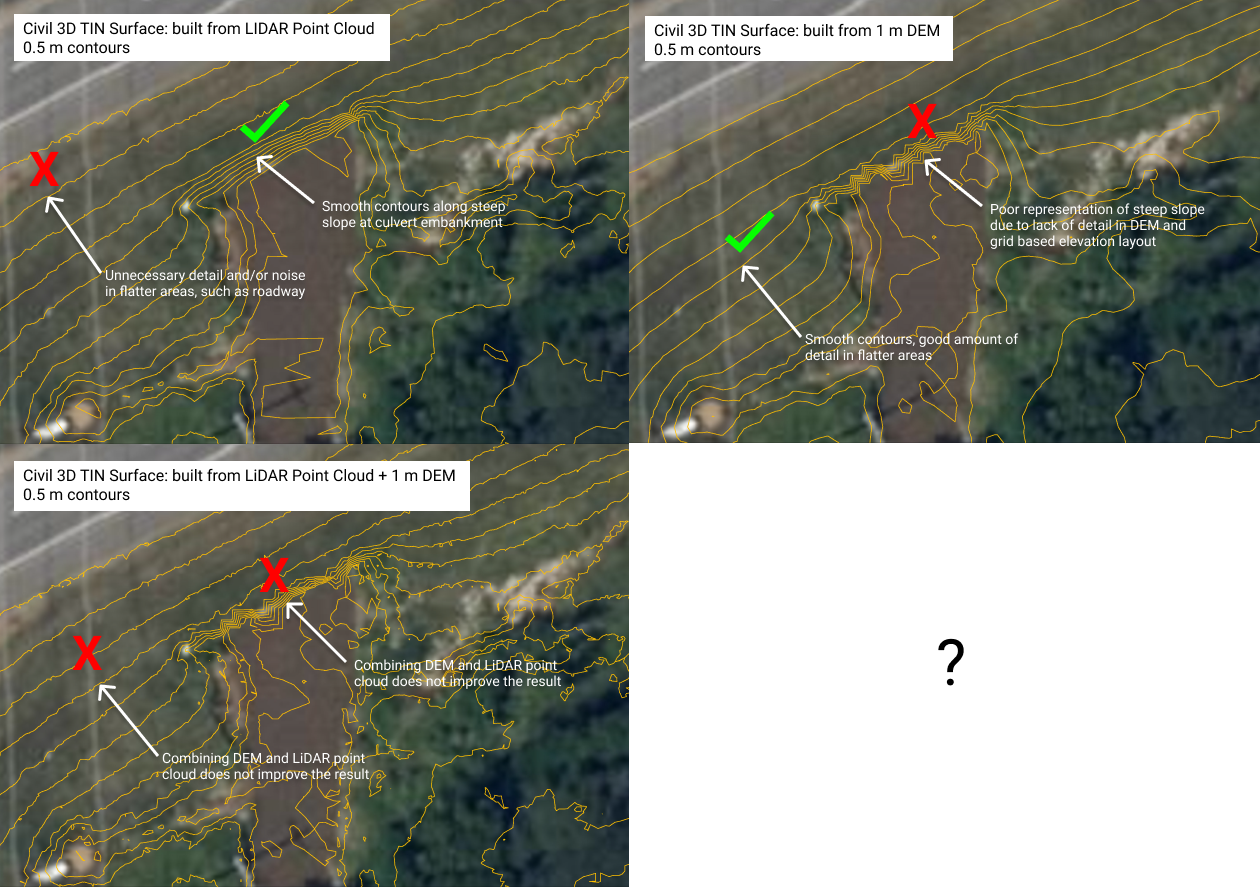
Take a look at the images below. The image on the left-top shows a surface built from a lidar point cloud, visualized as 0.5 m contours. As you can see, the contours along the culvert opening are smooth and do a good job to represent the rapid change in elevation. On the other hand, the contours along the road and slope may contain an unnecessary level of detail (notice how they are jagged), that may be undesirable for visualization purposes.
In contrast, the image in the top-right shows a surface built from a 1 m DEM, visualized as 0.5 m contours. The result is smooth contours along the road and slopes, but jagged contours along steep elevation changes (such as the culvert opening). The jagged contours are a result of the 1 m grid based layout. The resolution of the 1 m DEM is not fine enough to capture the rapid change of elevation at the culvert opening. This results in contours that appear to follow the 1 m grid layout of the DEM.
It may be tempting to combine and overlap these two data sets (lidar plus DEM) to create a hybrid surface, but this results in a “worst of both worlds” scenario, as shown in the image on bottom-left.
So what are best practices?
How to Create Smooth Contours and Smarter Surfaces using LiDAR in Civil 3D
The video below goes through, step by step, how to create a surface in Civil 3D from a lidar point cloud and lidar-derived data. The video explains how to combine different data formats to create an existing conditions surface with smooth contours and a variable level of detail.