How to Create Contours in QGIS from a DEM:
- Download DEM file
- Open the DEM in QGIS
- Run the contours process
Step 1
Download DEM File
Note: In this example, we use a DEM exported from Equator.
1. Visit Equator Studios and go to the Data Menu
2. Select Digital Elevation Model from the left-hand Data menu
3. Select a site where you would like to get a DEM by clicking the + button
4. Click ‘Generate’
5. Once your DEM appears in the Layers Menu, click the Download button on the layer to download it

Image of our DEM in Equator
Step 2
Open the DEM in QGIS
Open your DEM shapefile in QGIS by dragging and dropping the file into the map space.

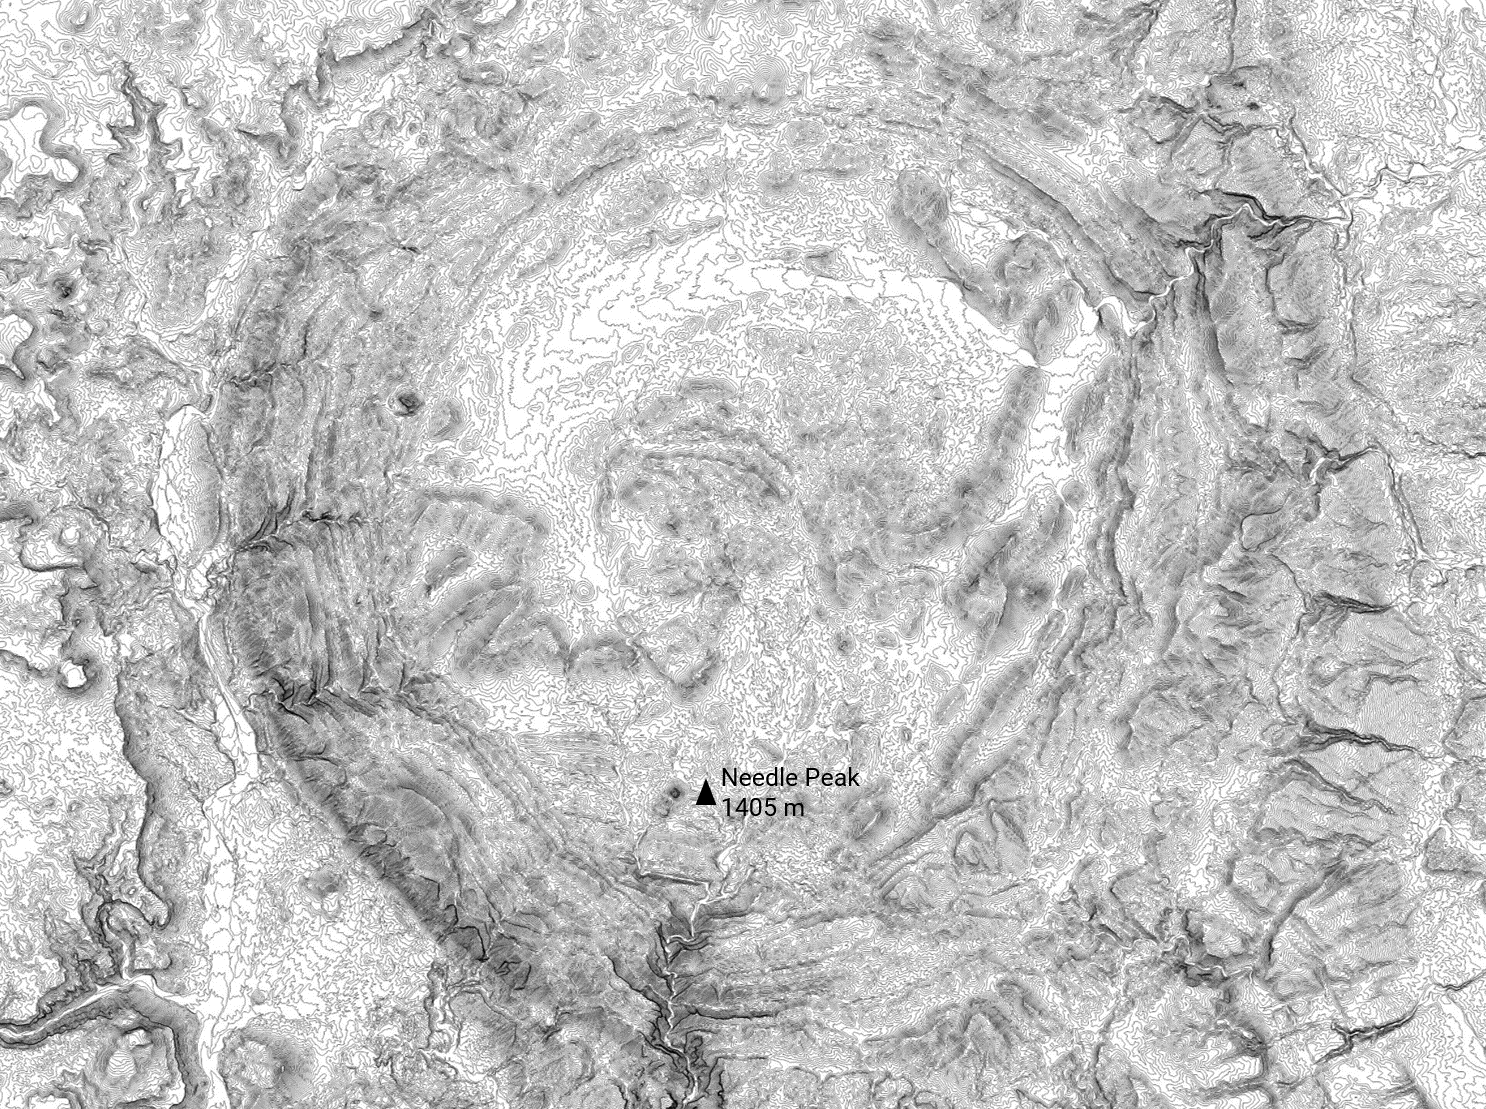
Image of our DEM in QGIS
Step 3
Run The Contour Process
Now that we have projected our DEM onto our project, we will run the Contour process:
Processing → Toolbox → GDAL → Raster extraction → Contour
Set the input layer as your DEM, and adjust the other input settings as you deem appropriate (in this case we elected to leave the default settings):

Using the Contour process to generate the final layer
Done!
You now have a layer with contours built from your DEM!
We hope this helps. Take a look at some of Equator’s other blogs and “How-to tutorials”!