User Guide / Data Menu Overview
Data Menu (Topography) Overview
Video Overview
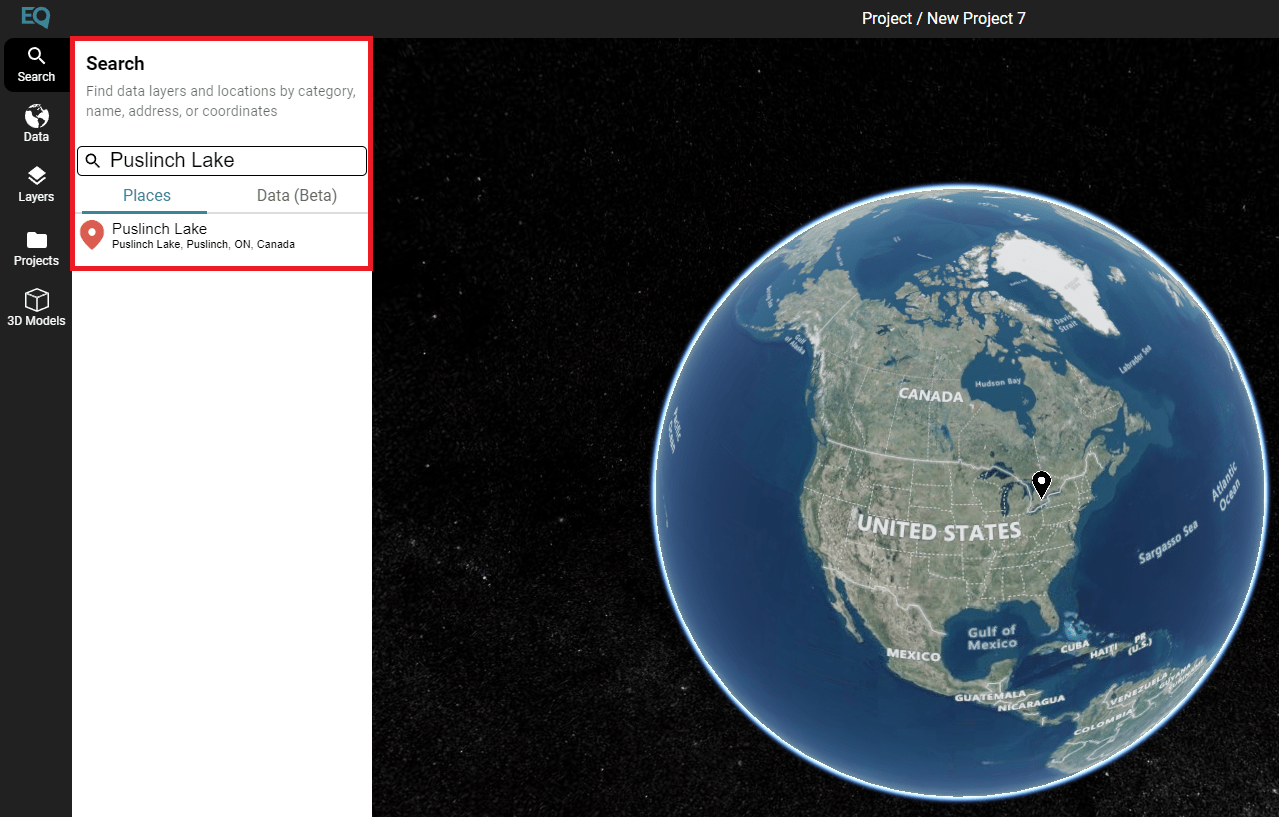
Step 1: Search for your location
Use the search feature to find your area of interest. Click on the results under ‘Places’ to navigate to your location of interest. Use a mouse or track pad to zoom in and out of the map.
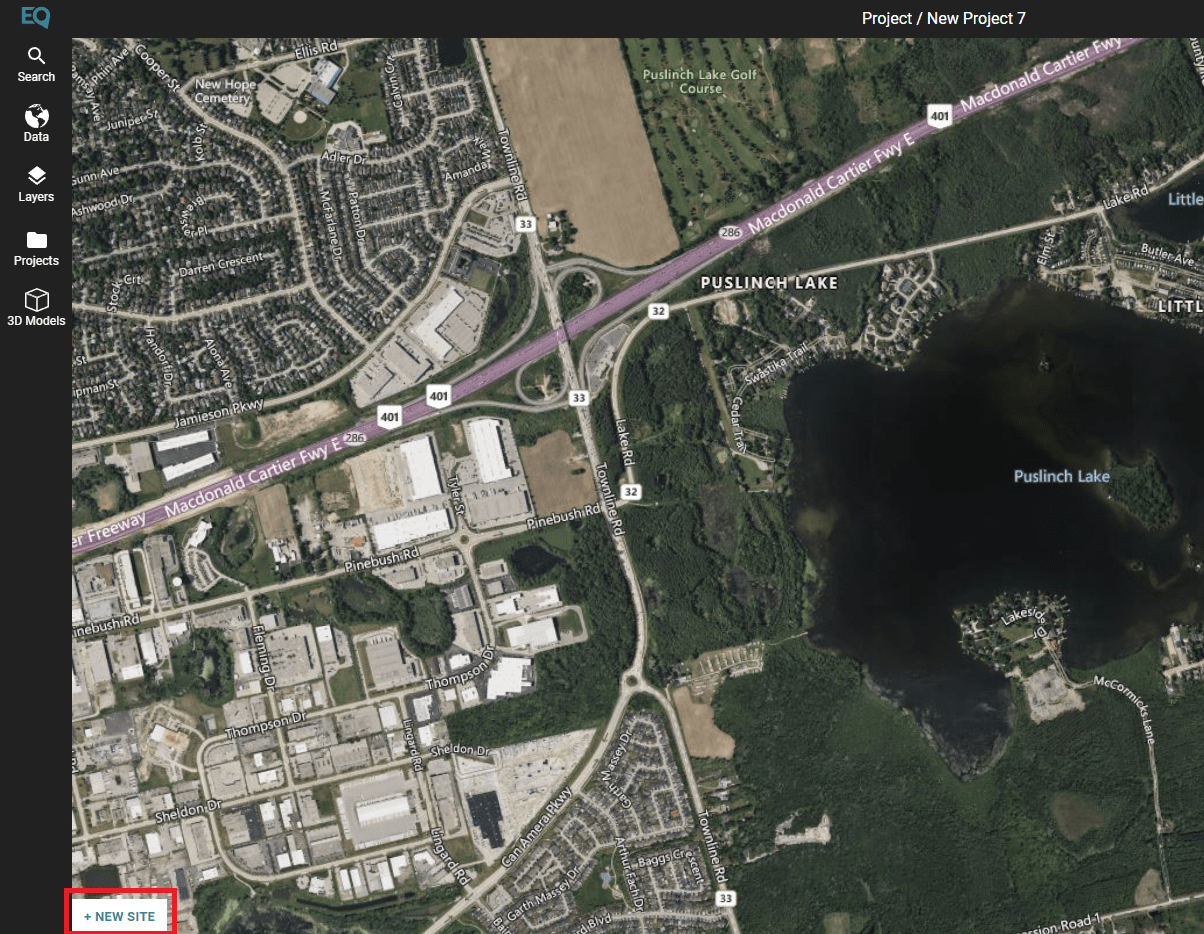
Step 2: Click the “+ New Site” button to add a new site
In the bottom-left section of the screen, click on the “+ New Site” button to open the site selection menu.
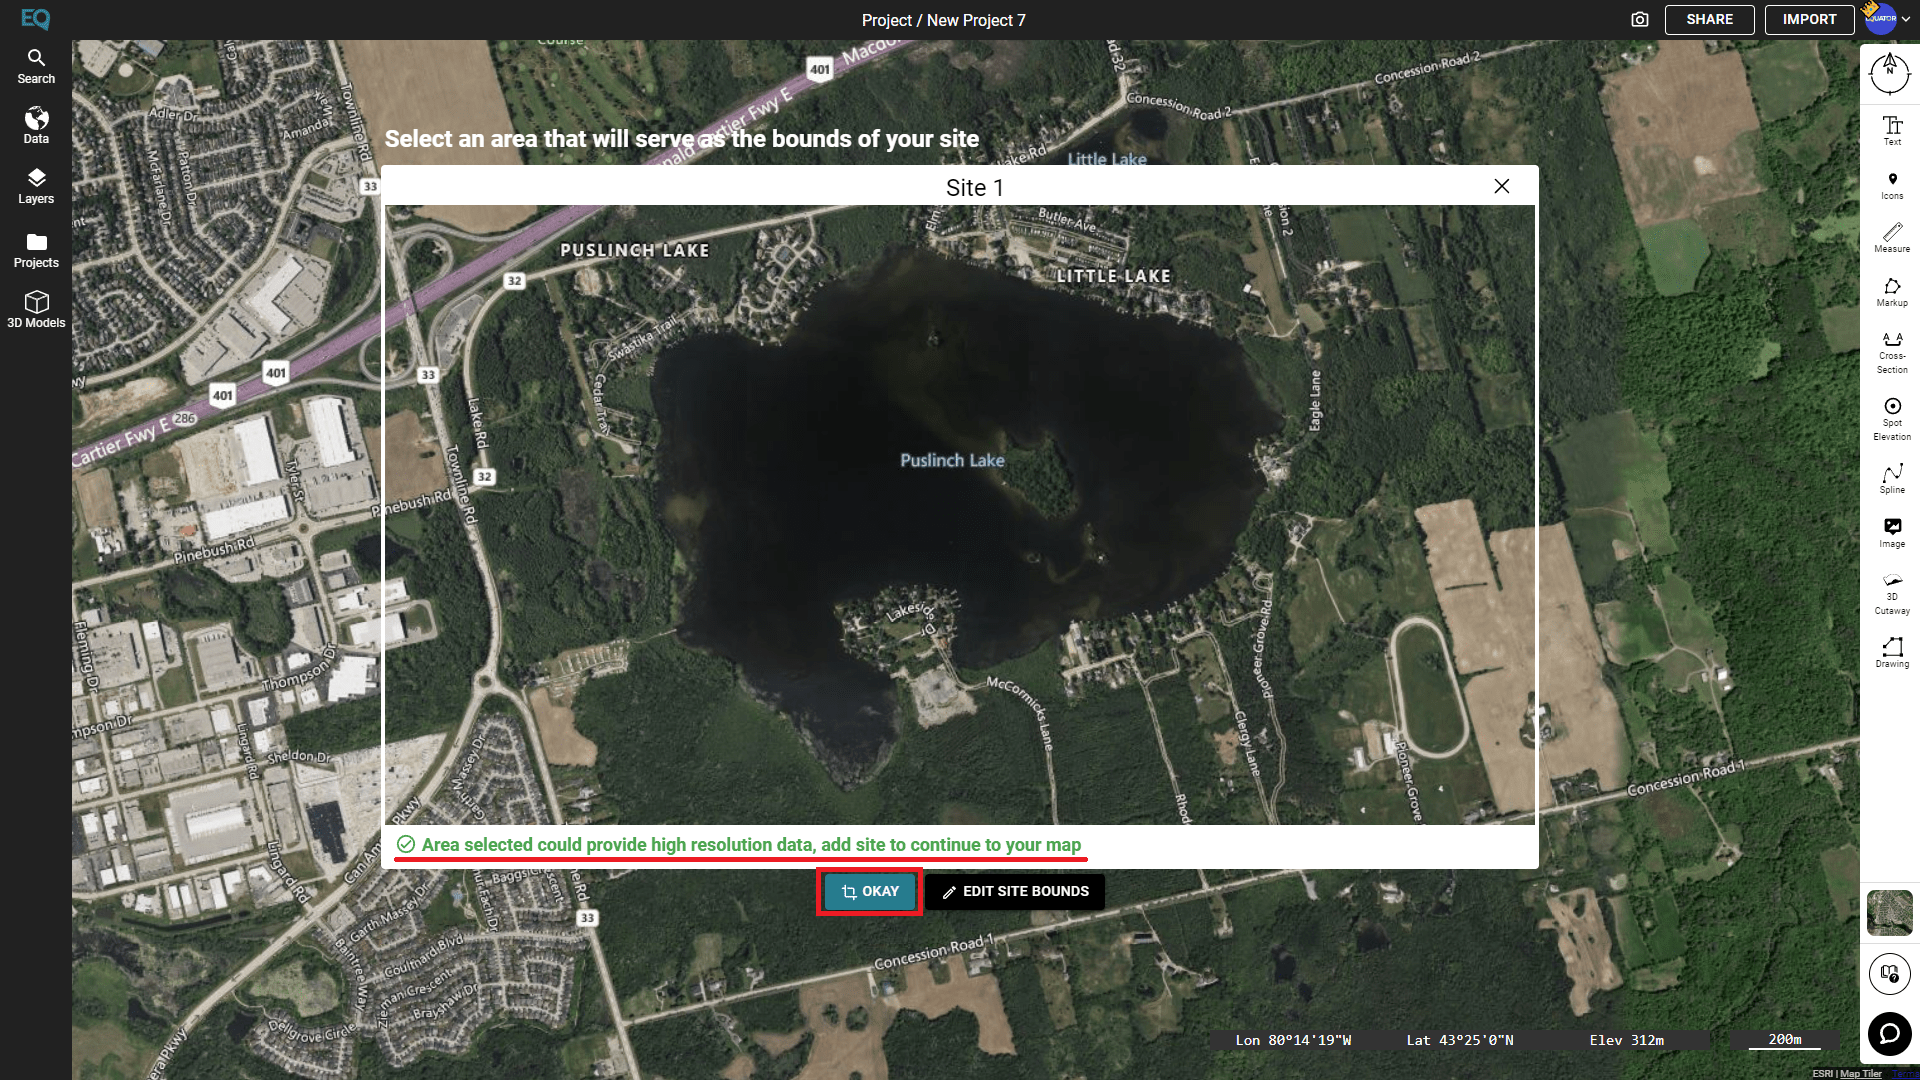
Step 3: Frame and add a new site
Zoom in and out, and pan around the map until your site is highlighted by the frame. Once you are happy with the site bounds and the message at the bottom of the frame turns green, click on the “OKAY” button. Alternatively, you can click on “Edit Site Bounds” to draw a custom site boundary.
Step 4: Explore available data
In the menu on the left, review the available data products.
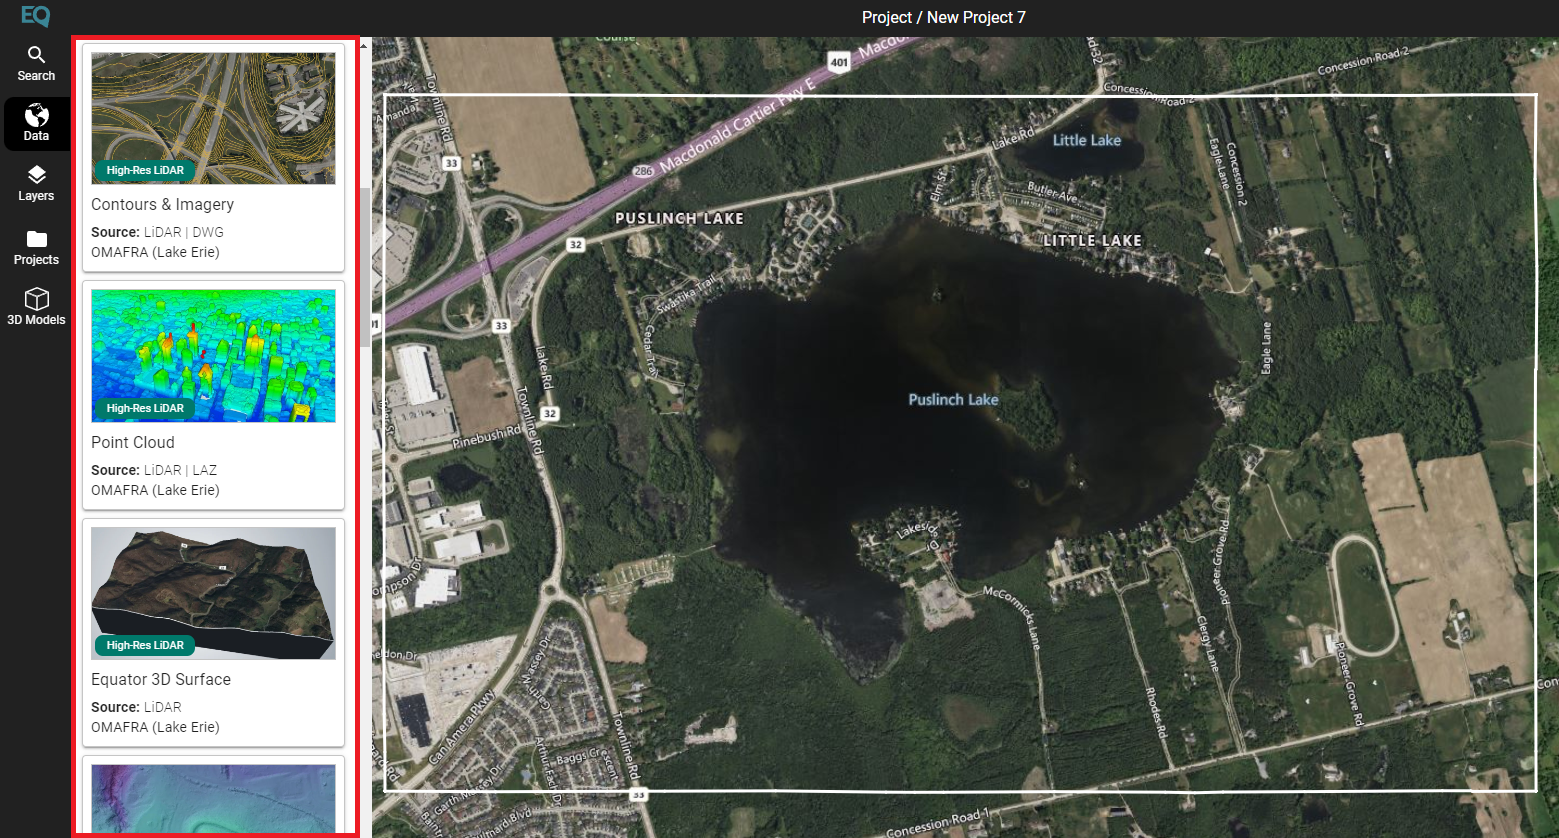
Step 5: Add data to your site
Mouse over the data products to reveal a green “+”. Click the green “+” to add a data product to your site. This may take anywhere from a few seconds to a few minutes depending on the size of the site.
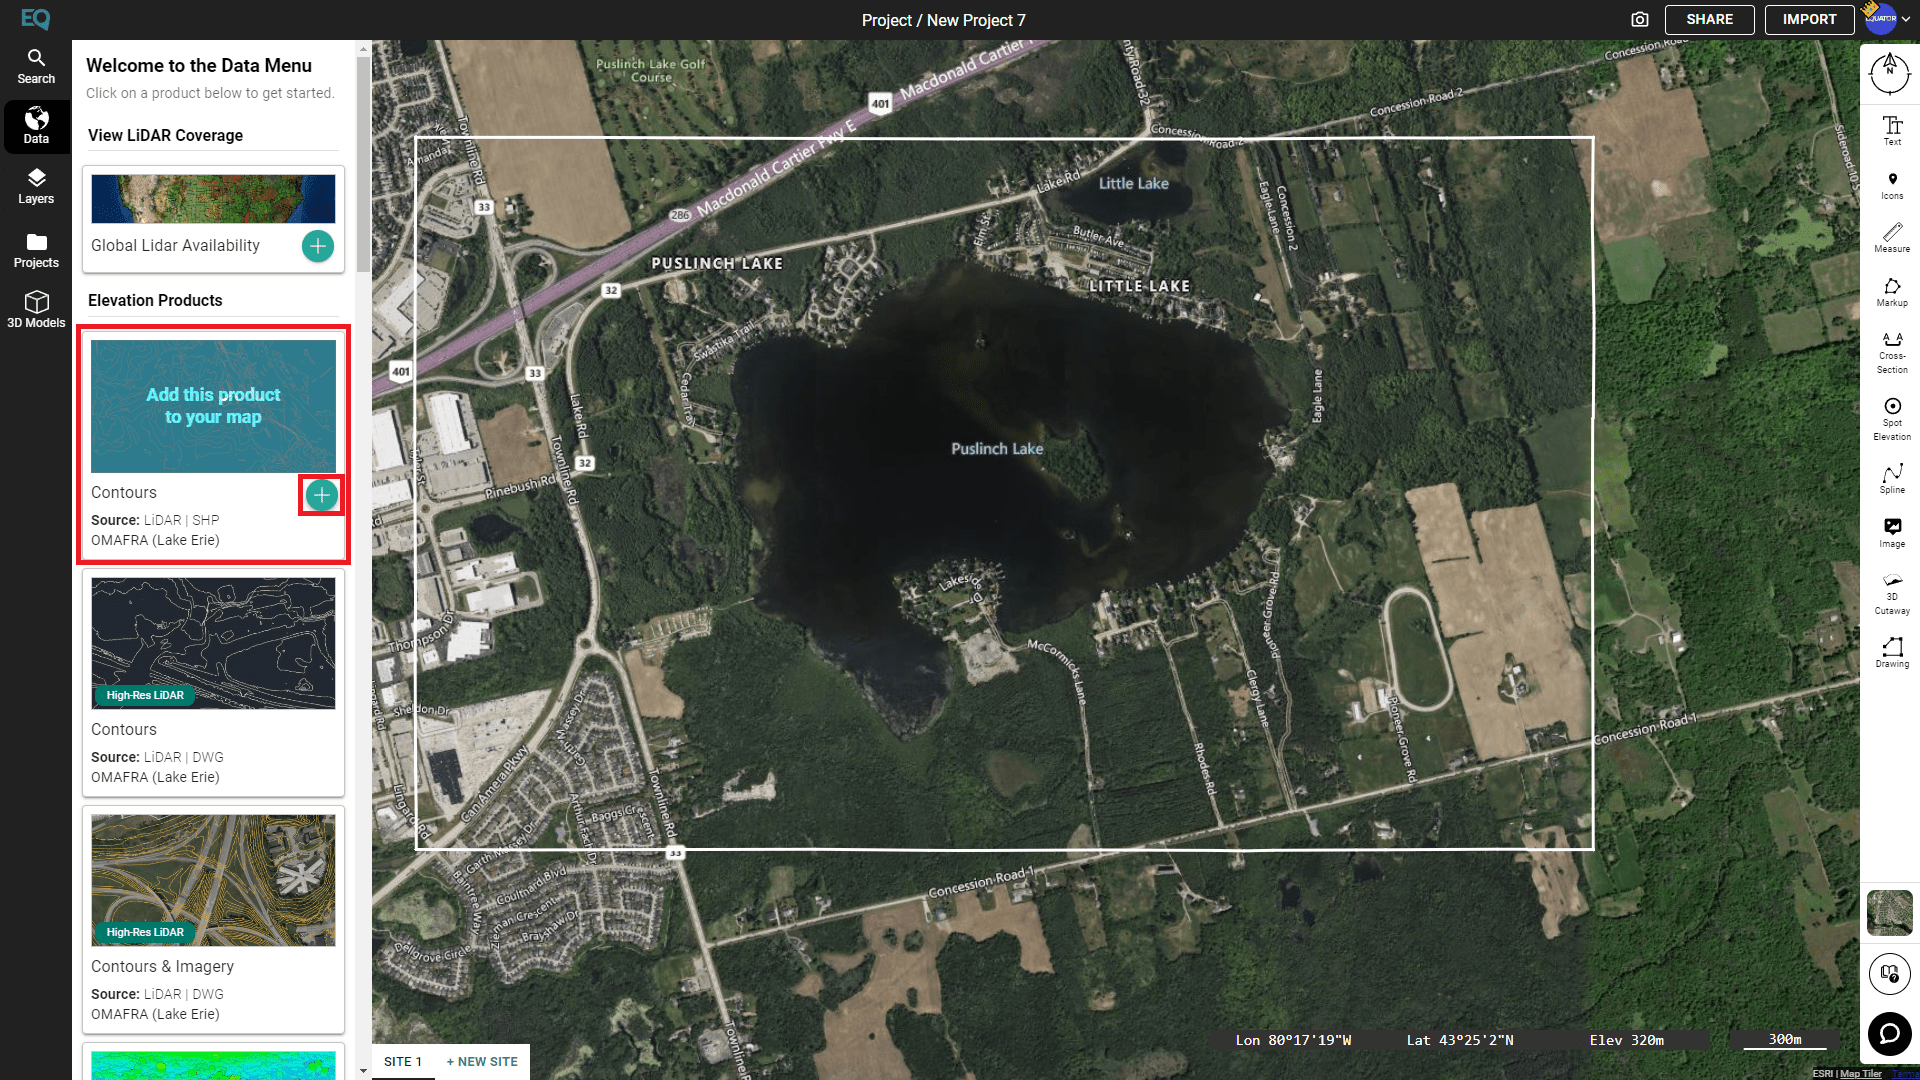
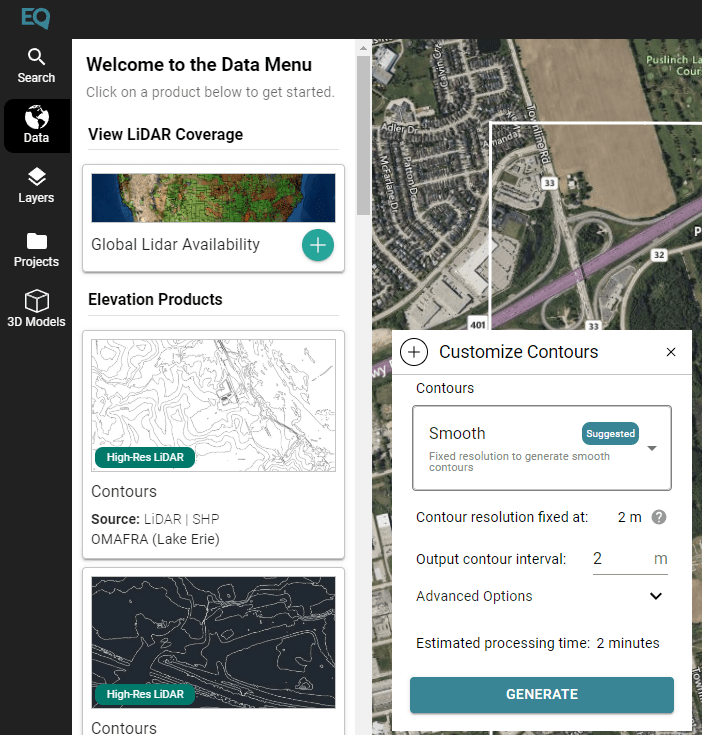
Step 6: Choose the desired resolution
Some products, such as contours and digital elevation models, will allow you to enter the desired resolution prior to adding data. You can type in the desired resolution, or go with our suggested settings.
Step 7: Wait for data to process
In the layers menu, review the progress of the processing data (green status bar). Once the data has finished processing, it will appear on the map. You can also see the progress at a glance by looking at the loading bar under layers in the sidebar menu.
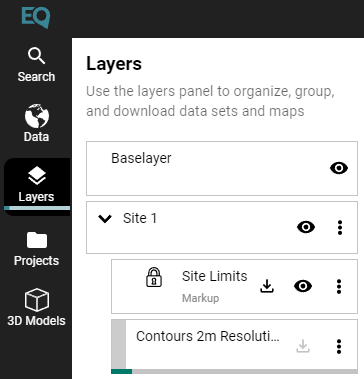
Step 8: View and download data
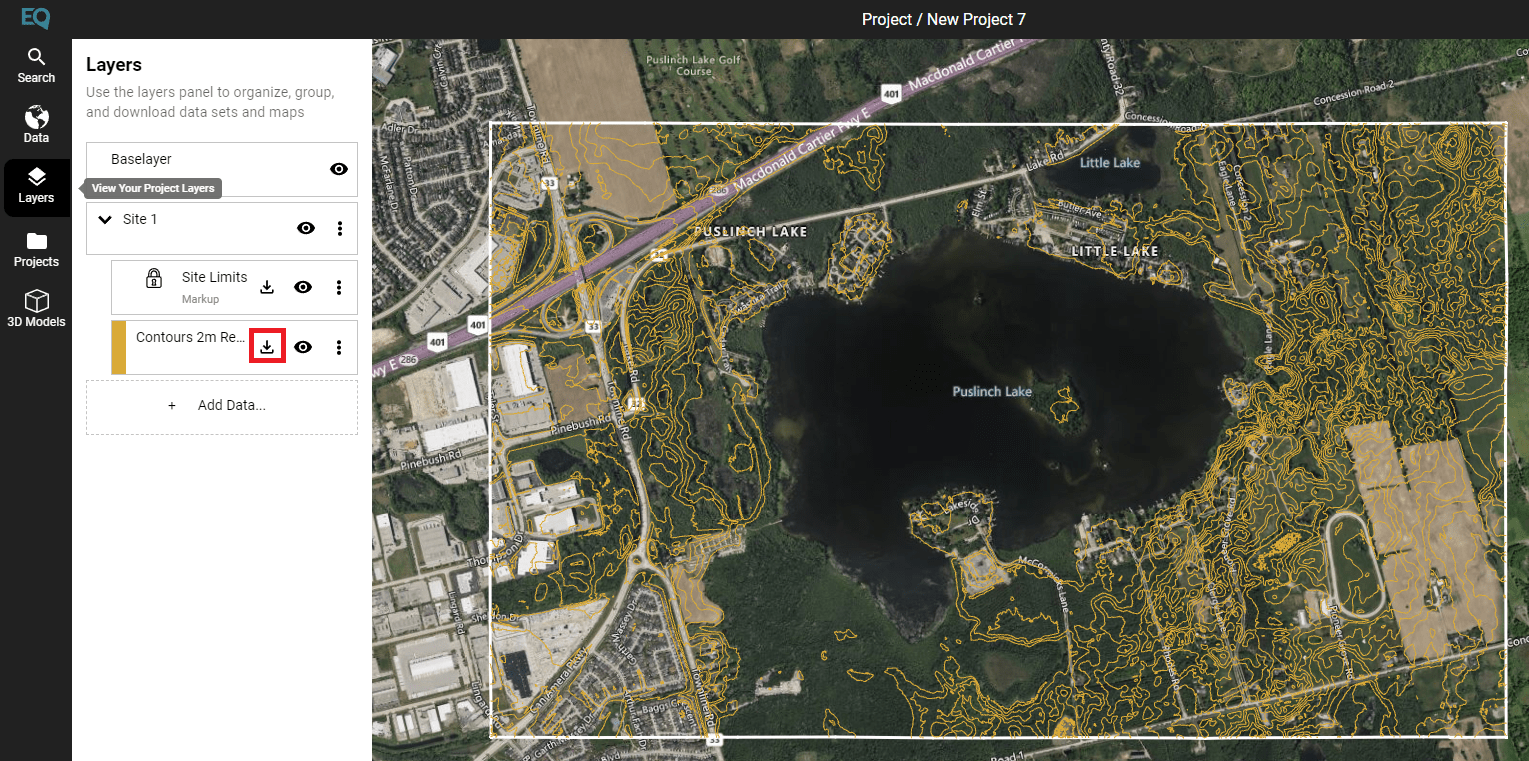
Once the data has finished processing, it will appear in your map for viewing (e.g. contours). You can use the download button on the layer to save a copy of the data.
