Extract 3D Buildings from LiDAR Data in ArcGIS Pro
This Equator and ArcGIS Pro Tutorial guides you through how to create realistic 3D buildings using a LiDAR point cloud, or LAS file
There are 8 steps in this tutorial, beginning with sourcing a LiDAR point cloud and finishing with creating realistic 3D buildings in ArcGIS Pro. Essentially, this takes you through how to digitize LiDAR data and make a 3D scene with the buildings.
Step 1: Choose a place and source LiDAR data
Step 2: Add LiDAR to ArcGIS Pro and process information to create LAS dataset
Step 3: Classify the LAS dataset from building points
Step 4: Create a raster file from LAS dataset to create building footprints
Step 5: Select and filter raster dataset from parameters
Step 6: Edit building polygons layer
Step 7: Create a multipatch layer
Step 8: Navigate to realistic 3D buildings
How to Extract 3D Buildings from LiDAR in ArcGIS Pro
Step 1: Source LiDAR Data
If you already have a LiDAR point cloud, you can skip down to Step 2. If you need a LiDAR point cloud, follow the steps below to generate a .laz file using Equator.
- Locate your project site by using the Search tab or simply zooming into your site.
- Create your site boundaries by clicking on the +NEW SITE button on the bottom left of the screen. Use one of the predefined boundary boxes or create a custom boundary. Don’t forget to name your project site.
- Under the Data tab, click on the Point Cloud option.
- The Point Cloud dialog box will appear. Select your project site, source dataset and any customizations. Then click Generate.
- The point cloud for your project site will appear within the site boundary.
- To export the point cloud out of Equator, go to the Layers tab and click the download button beside the point cloud layer.
- The Customize Download dialog box will appear. Select LAZ as your format, set your coordinate system, and press Process.
- Your LiDAR point cloud (.laz file) will download into your Downloads file.
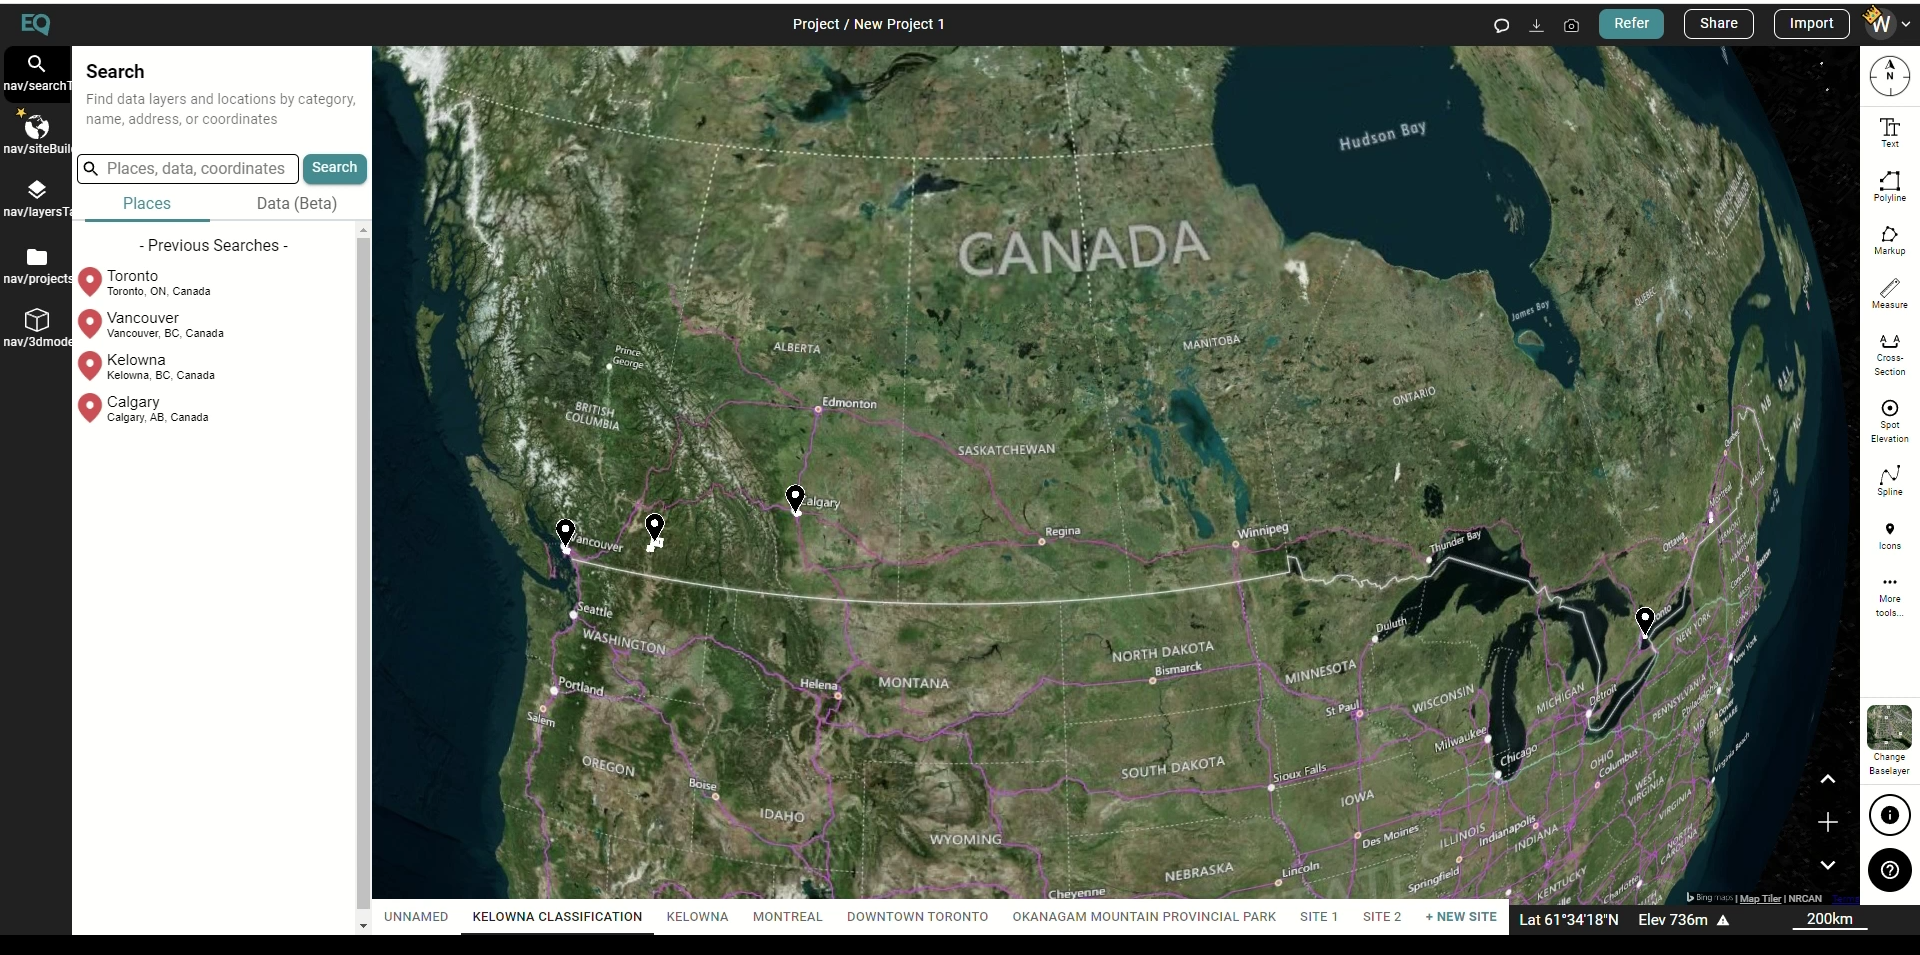
Log into Equator and Search for Project Location
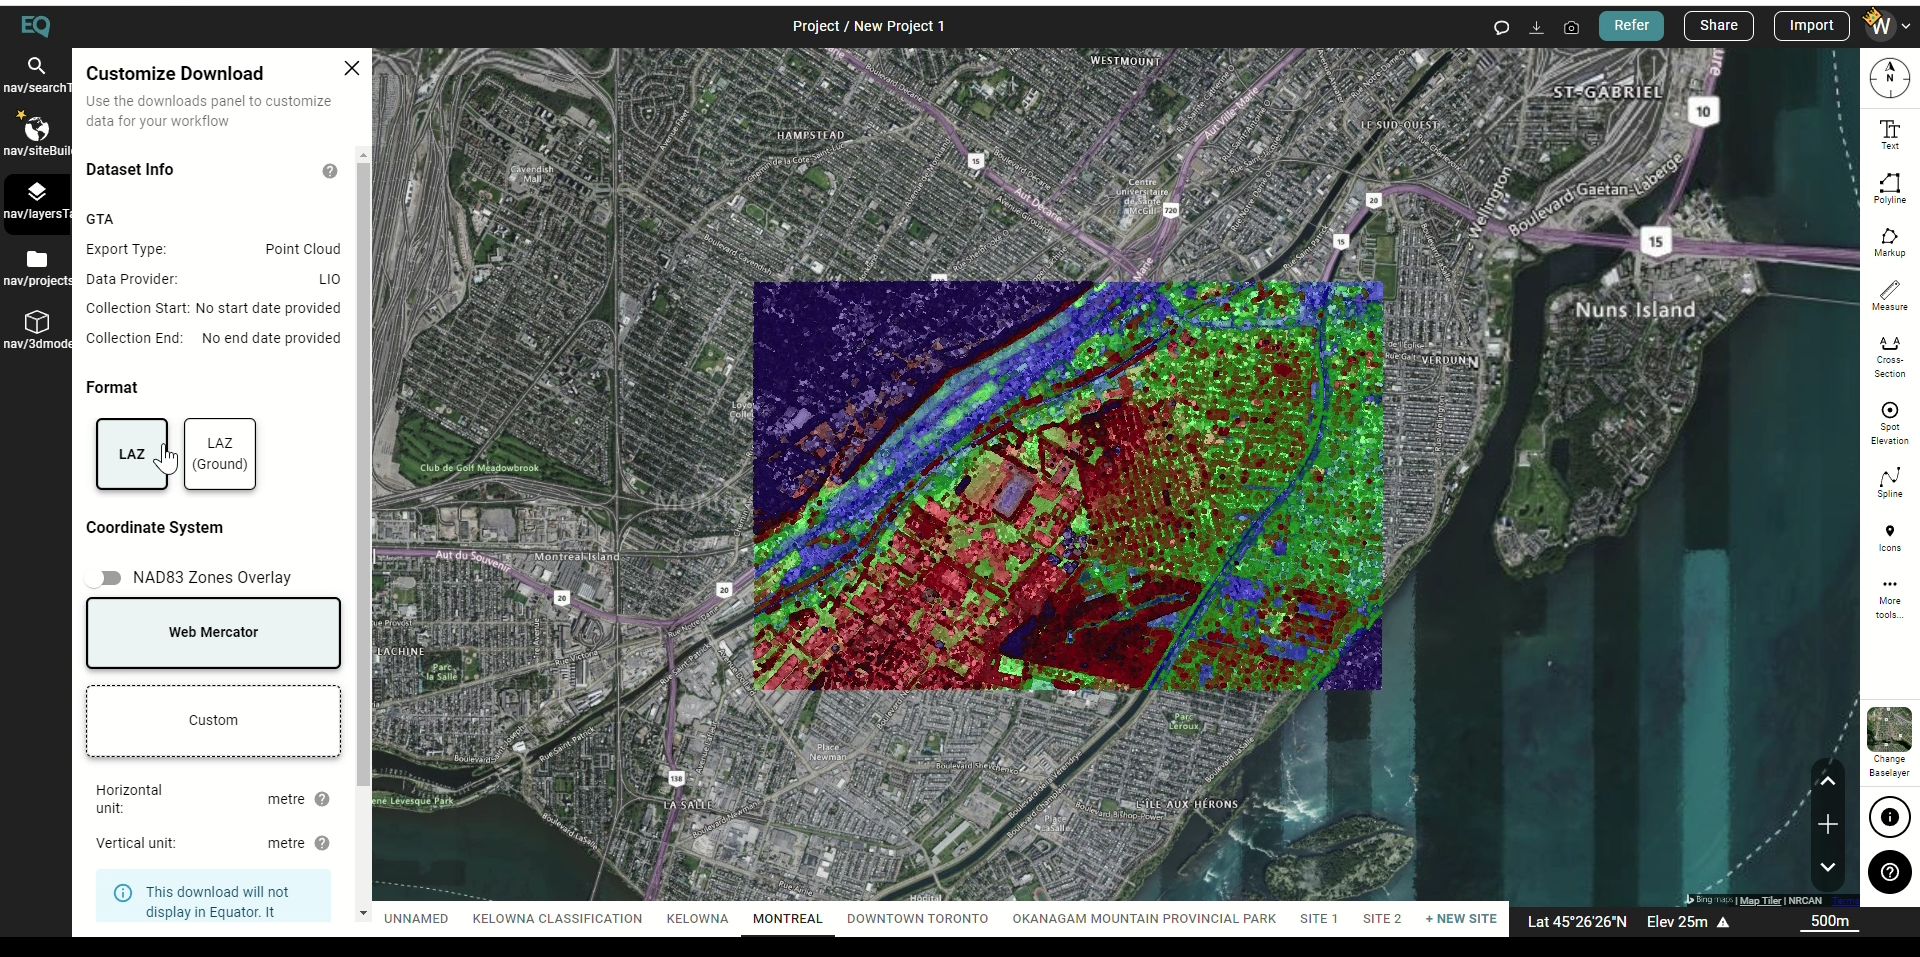
Download LiDAR Point Cloud from Equator
Step 2: Create LAS Dataset
Begin by opening ArcGIS Pro, then follow the steps below.
- On the open screen, select New Map to create a new project. Name the new project, click ok and then either select a location or zoom to your project location.
- On the top menu, select View > Catalog View. Move the Catalog Menu to the side of your screen and under this menu select Project > Folders. Select your project and create a new folder to save all the information that will be processed throughout this process.
- In the main menu, select View > Geoprocessing. When the Geoprocessing menu comes up, search for Convert LAS and double click on the Convert LAS tool. In the Input LAS heading, click on the file folder and select the LAS or LAZ file that was downloaded in step 1. Under the Target Folder heading, click on the file folder and select the file that you just created. Leave the LAS Options as default with only Rearrange Points selected. Click Run.
- In the Geoprocessing dialog box, search for and select Create LAS Dataset. Select your input (point_cloud_undefined.laz) and output files (buildings.lasd), assign the coordinate system and press Run.
- Load the dataset (buildings.lasd) that was just created onto the map.
Step 3: Classify LAS Dataset
In this step we are going to go through how to classify the LAS dataset that was just created in Step 2 to show the building points.
- In the top menu, the LAS Dataset Layer tabs (Appearance, Data, Classification) should be visible. In the Appearance tab, select Symbology > Class.
- In the Contents menus, under Classification, select Building.

Classify LAS Dataset

Classify LAS Dataset
Step 4: Create Raster File
In this step we will use the LAS dataset to create a raster files that show the building footprints.
- In the top menu, select View > Geoprocessing. In the Geoprocessing dialog box, search for and select LAS Point Statistics As Raster.
- Under Input LAS Dataset, select the LAS Dataset (buildings.lasd) that you created in Step 2. Under the Output Raster, name the file (buildings_raster). Set the method to Most Frequent Class Code and Sampling Type to Cell Size. Set the Sampling Value. Click Run.
- Your raster file will be created after a few minutes.
- Under the Contents menu, change the classification of the LAS dataset (buildings.lasd).

LAS Point Statistics as Raster

LAS Point Statistics as Raster
Step 5: Filter Raster Dataset
In this step, we will use the raster file created in Step 4 to create polygons.
- In the top menu, select View > Geoprocessing. In the Geoprocessing dialog box, search for Raster to Polygons.
- Under Input Raster, add the raster that you just recreated in Step 4 (buildings_raster). Under the Output Polygon Features, name your polygon layer (Buildings_Ras_LAS). Check the Simplify polygons box, then click Run.
- Your polygon file will be created within a few minutes.
Step 6: Edit Polygons
You may have noticed that some of your building polygons have inner polygons. In this step we edit the building polygons so they no longer have “holes”.
- In the top menu, select View > Geoprocessing. In the Geoprocessing dialog box, search for Select Layer by Attribute.
- Under Input Rows, select the Polygon layer that you created in Step 5 (Building_Ras_LAS). Under Expression, select +New expression. Set expression to where Shape_Area is greater than 100. Select Run.
- Now eliminate all the small polygons that are not buildings or the polygons that were created within the building polygons. In the top menu, select View > Geoprocessing. In the Geoprocessing dialog box, search for and select Eliminate Polygon Part.
- Under Input Features, select the Polygon layer that you created in Step 5 (Building_Ras_LAS). Set the Output Feature Class to Building_Raw_LAS_Eliminate. Set the Condition to Area, and set your area. Click the box for Eliminate contained parts only. Select Run.
- In the top menu, select View > Geoprocessing. In the Geoprocessing dialog box, search for and select Regularize Building Footprint. Set the Input Features to the polygon layer you just created (Building_Raw_LAS_Eliminate). Set Method to Right Angles, then set your the Tolerance, Densification, and Precision. Name your new layer under Output Feature Class (Building_Regularize). Select Run.
- To get rid of any other polygons that were formed within the building boundaries, they will have to editing manually. In the top menu, go to Edit > Select > Modify. Under Edit, Tools, select Reshape. Make the polygons inside the buildings as small as possible. Then select Edit Vertices and delete the remaining inner polygons. Don’t forget to save your edits.

Select Layer by Attribute

Regularize Building Footprint
Step 7: Create Multipatch Layer
In this step, we are going to create the 3D buildings for our scene.
- Navigate to the Catalog dialog box. Select Scene.
- Now create a DEM in Scene with ground points from the LAS file. In the Contents dialog box, select the LAS Dataset that you created in step 2 (Buildings.lasd).
- In the top menu, select View > Geoprocessing. In the Geoprocessing dialog box, search for and select LAS Dataset to Raster. Your input layer is going to be the LAS Dataset. Name your output raster something that includes DEM (BuildingsDEM). Keep the rest the same and select Run.
- Create a new scene and load the polygons. Go to the top menu, select Insert > New Map > Scene. Copy the polygons from the 2D scene to the scene that was just created.
- In the top menu, select View > Geoprocessing. In the Geoprocessing dialog box, search for and select LAS Building Multipatch. Set the Input LAS Dataset to your initial LAS Dataset (Buildings.lasd) and your Input Features to the polygon layer created in Step 6 (Buildings_Regularize). Set the LAS Rooftop Point Selection to Building Classified Points, and the Ground Height to Raster Layer and the DEM that was just created (BuildingsDEM). Name your Multipatch layer (Buildings_Regularize_LasBuil) and select Run.
- Your multipatch layer will appear after a few minutes.

LAS Dataset to Raster

LAS Building Multipatch
Step 8: Make the Buildings Realistic
In this last step, we are going to play around with the settings to make the scene look realistic.
- Go to the top menu and under the Map tab, select your basemap. By choosing an orthoimage option (in this tutorial we selected World Imagery) you can give the ground a realistic look.