Tutorial: How to Import Your DEM Into HEC RAS
Learn how to set your HEC RAS project up and bring your DEM into HEC RAS
Part 1: Find and export your DEM from Equator
- Create a Site
- Generate a DEM
- Download your DEM
Part 2: Set your project up in HEC RAS and import your DEM
- Set Up a New Project
- Create a New RAS Terrain
- Import Your DEM
Part 1: Find and Export Your DEM From Equator
Step 1: Locate Your Site
- Sign up or log into Equator
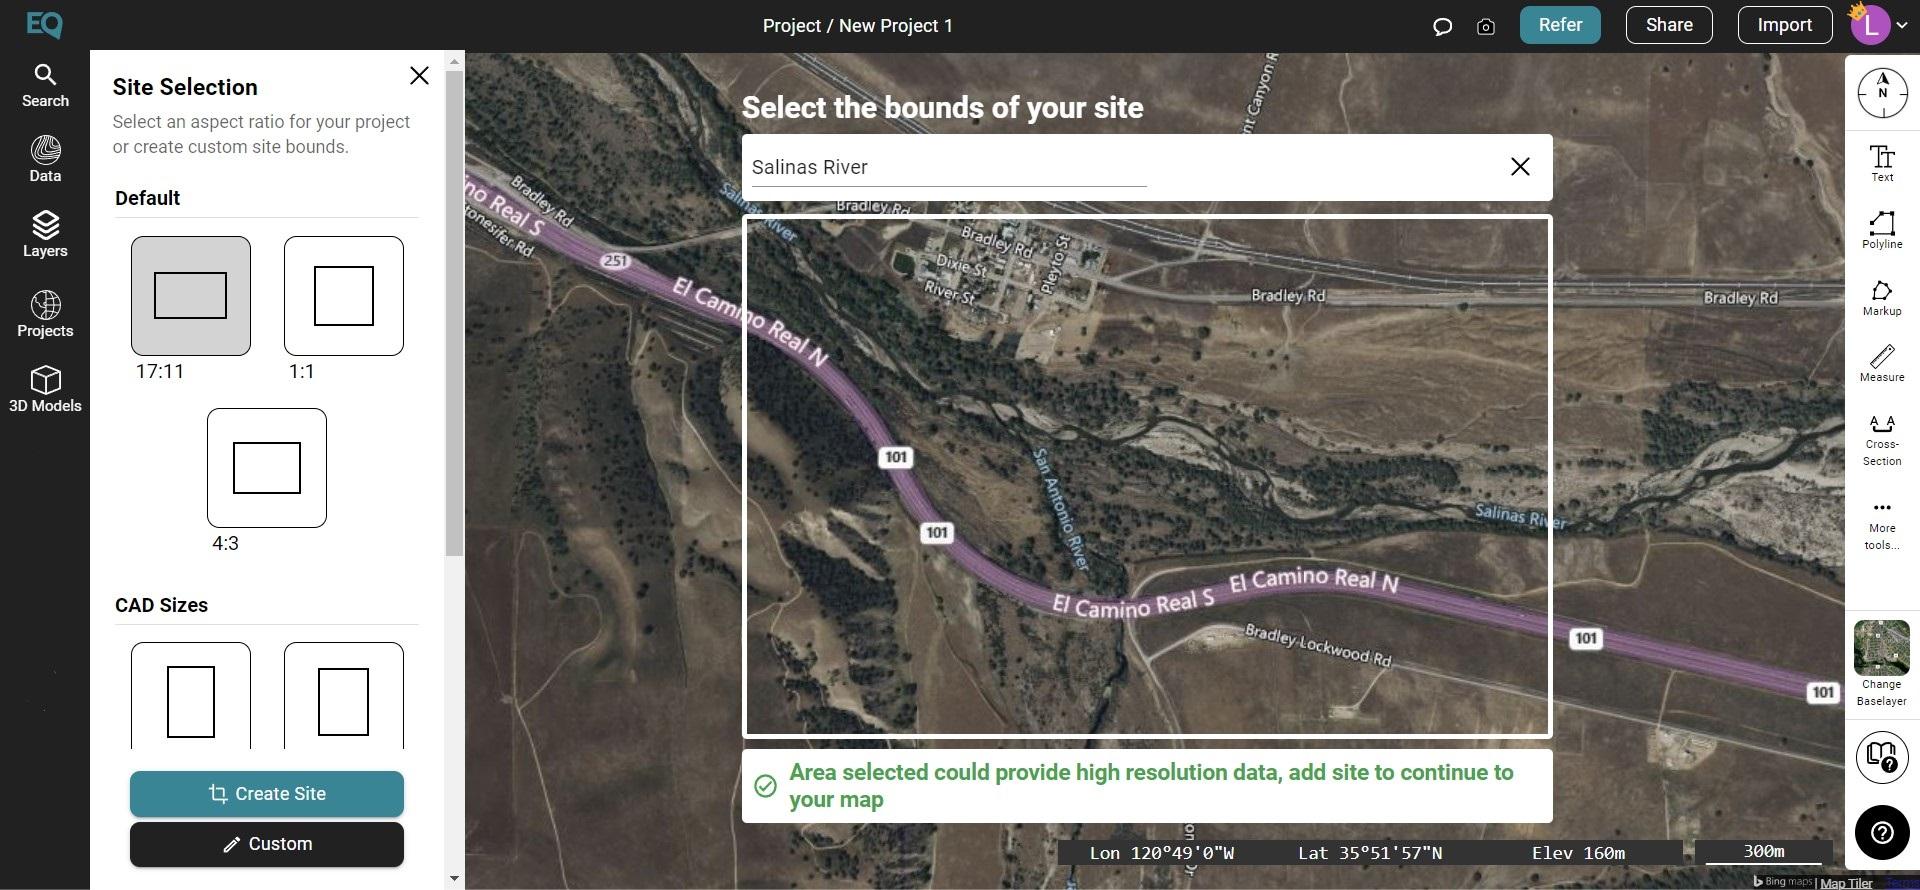
- Locate your site by using the search bar or zooming into your location
- Create a new site by selecting +NEW SITE at the bottom left of the screen. Select the appropriate size and shape of your site boundaries. Name your site.
Step 2: Generate a DEM
- Go to the data menu, under the first drop-down menu select Digital Elevation Model (DEM)
- In the pop-up menu on the left, select your site, your source dataset, and your customizations (the resolution).
- Then select generate. Once your DEM has been created, it will show up in the Layers menu.
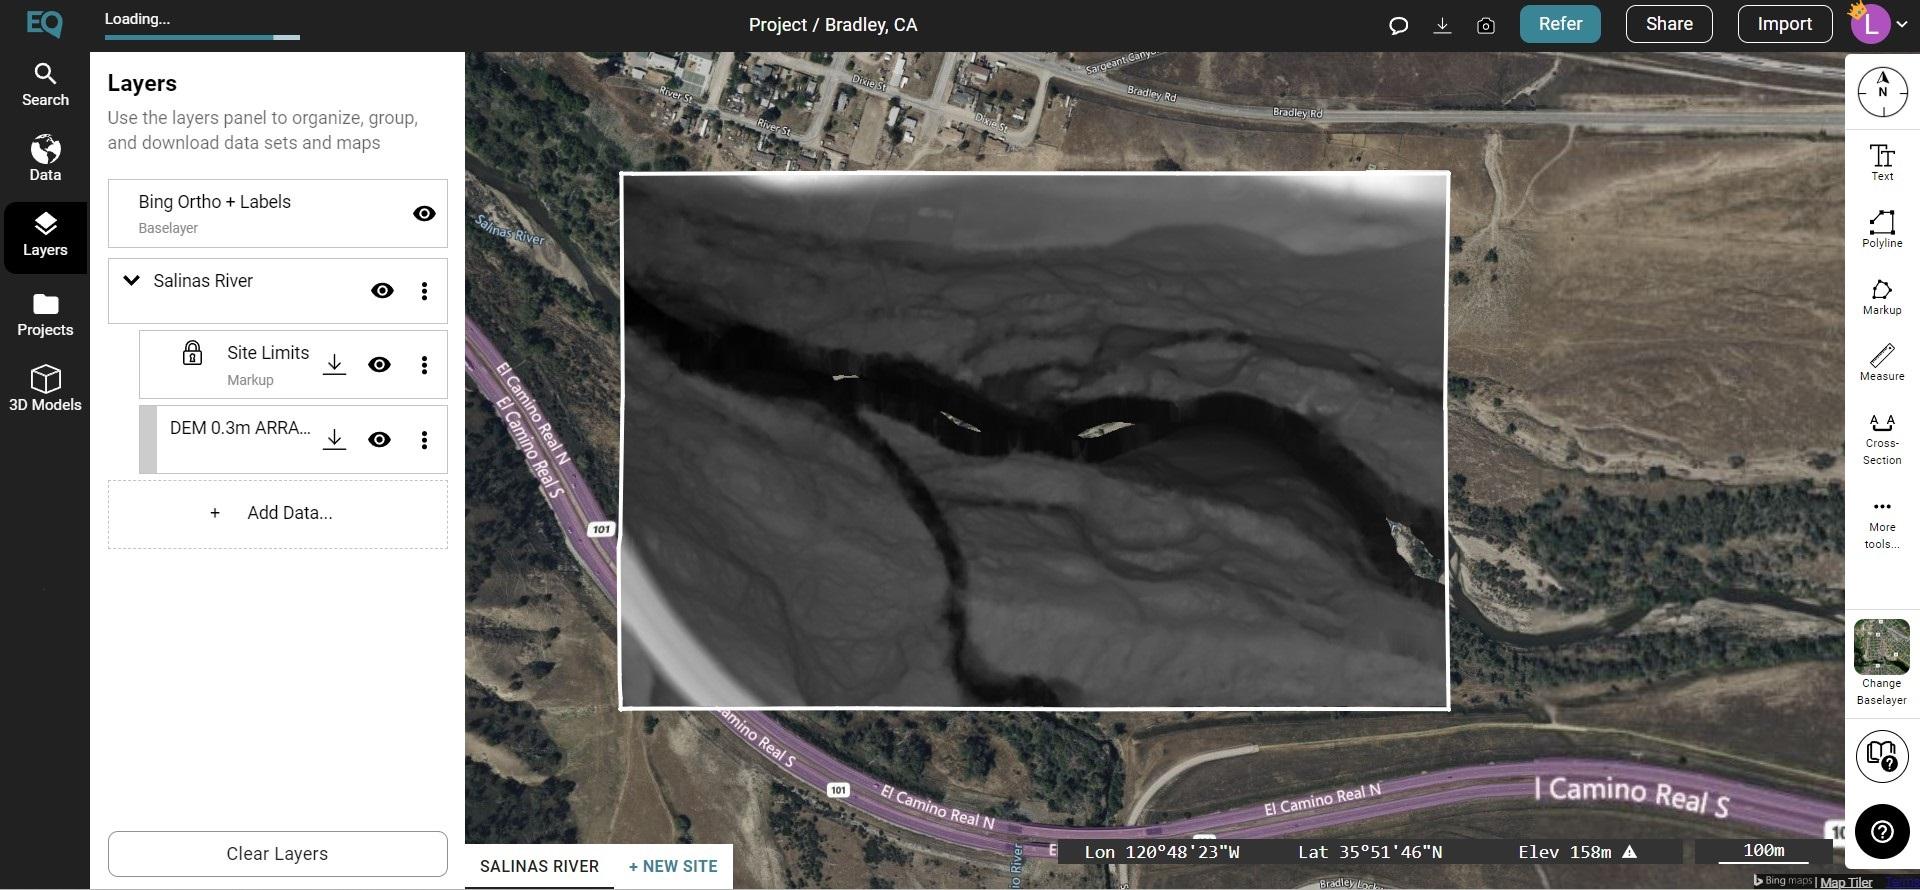
Generate and Download a DEM in Equator
Step 3: Download Your DEM
- Download your DEM, so it can be brought into HEC RAS. On the DEM that was created, select the down arrow for download. Select your format and coordinate system, then press Download.
Note: Your download may take a few minutes depending on its size. Once it has been downloaded, it will appear in your downloads folder.
Part 2: Set Your Project Up in HEC RAS and Import Your DEM
Step 1: Set up a New Project
- Open HEC RAS and create a new file (File > New Project). Select the location where your file will be saved to
- Set the proper units based on your DEM (Options > Unit Systems)

HEC RAS – Main Menu
Step 2: Create a New RAS Terrain
- Open RAS Mapper to view maps and data spatially
- You need to set the projection by going to Project > Set Projection. If you are using a DEM from Equator, you can skip this step.
- From the Layer list, right-click terrain, then select Create a New RAS Terrain.
Note: If you are using a DEM from Equator, the HEC RAS Spatial Reference System dialogue box comes up, you can press OK. It will open the RAS Mapper Options Menu. There should be no project listed in the projection tab. In the General tab, make sure the units under XS River Stations are set to the same units you identified in the Unit Systems dialogue box. If you are completing an analysis in the USA, the units should be set to feet. Then press OK.
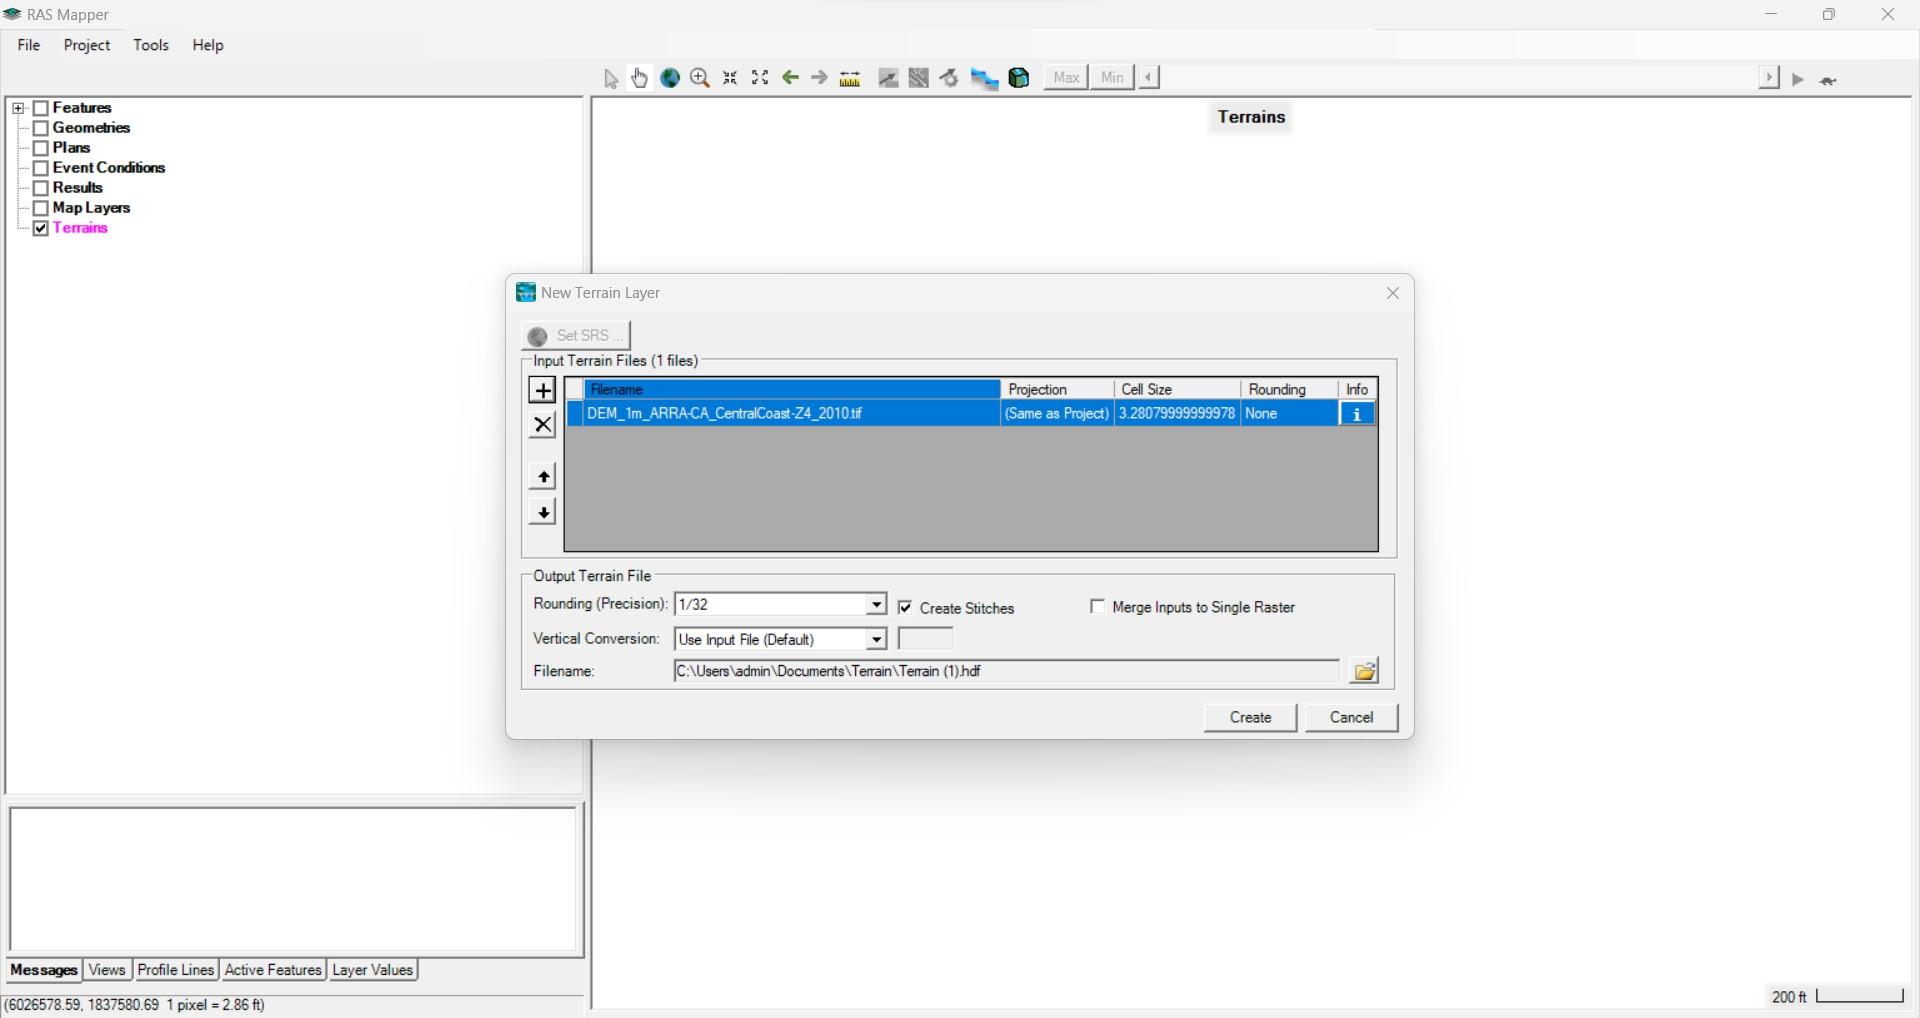
HEC RAS – RAS Mapper New Terrain Layer Dialog Box
Step 3: Import Your DEM
- The New Terrain Layer dialogue box will appear. Click the + button to input your terrain file. Find your DEM file, select open.
Note: If you are using a DEM from Equator, the Spatial Reference System dialogue box will appear telling you that you haven’t set the projection. Equator’s DEM has the projection built in so you can just click OK. - In the New Terrain Layer dialogue box, select Create once the DEM has loaded.
- Your DEM will now appear in the RAS Mapper under Terrain
- To check to make sure the location of your DEM is correct, right-click on the Map Layers tab in the Layers List and select Add Web Imagery. Select any of the options. Compare your DEM to the web imagery. Is it in the right spot?
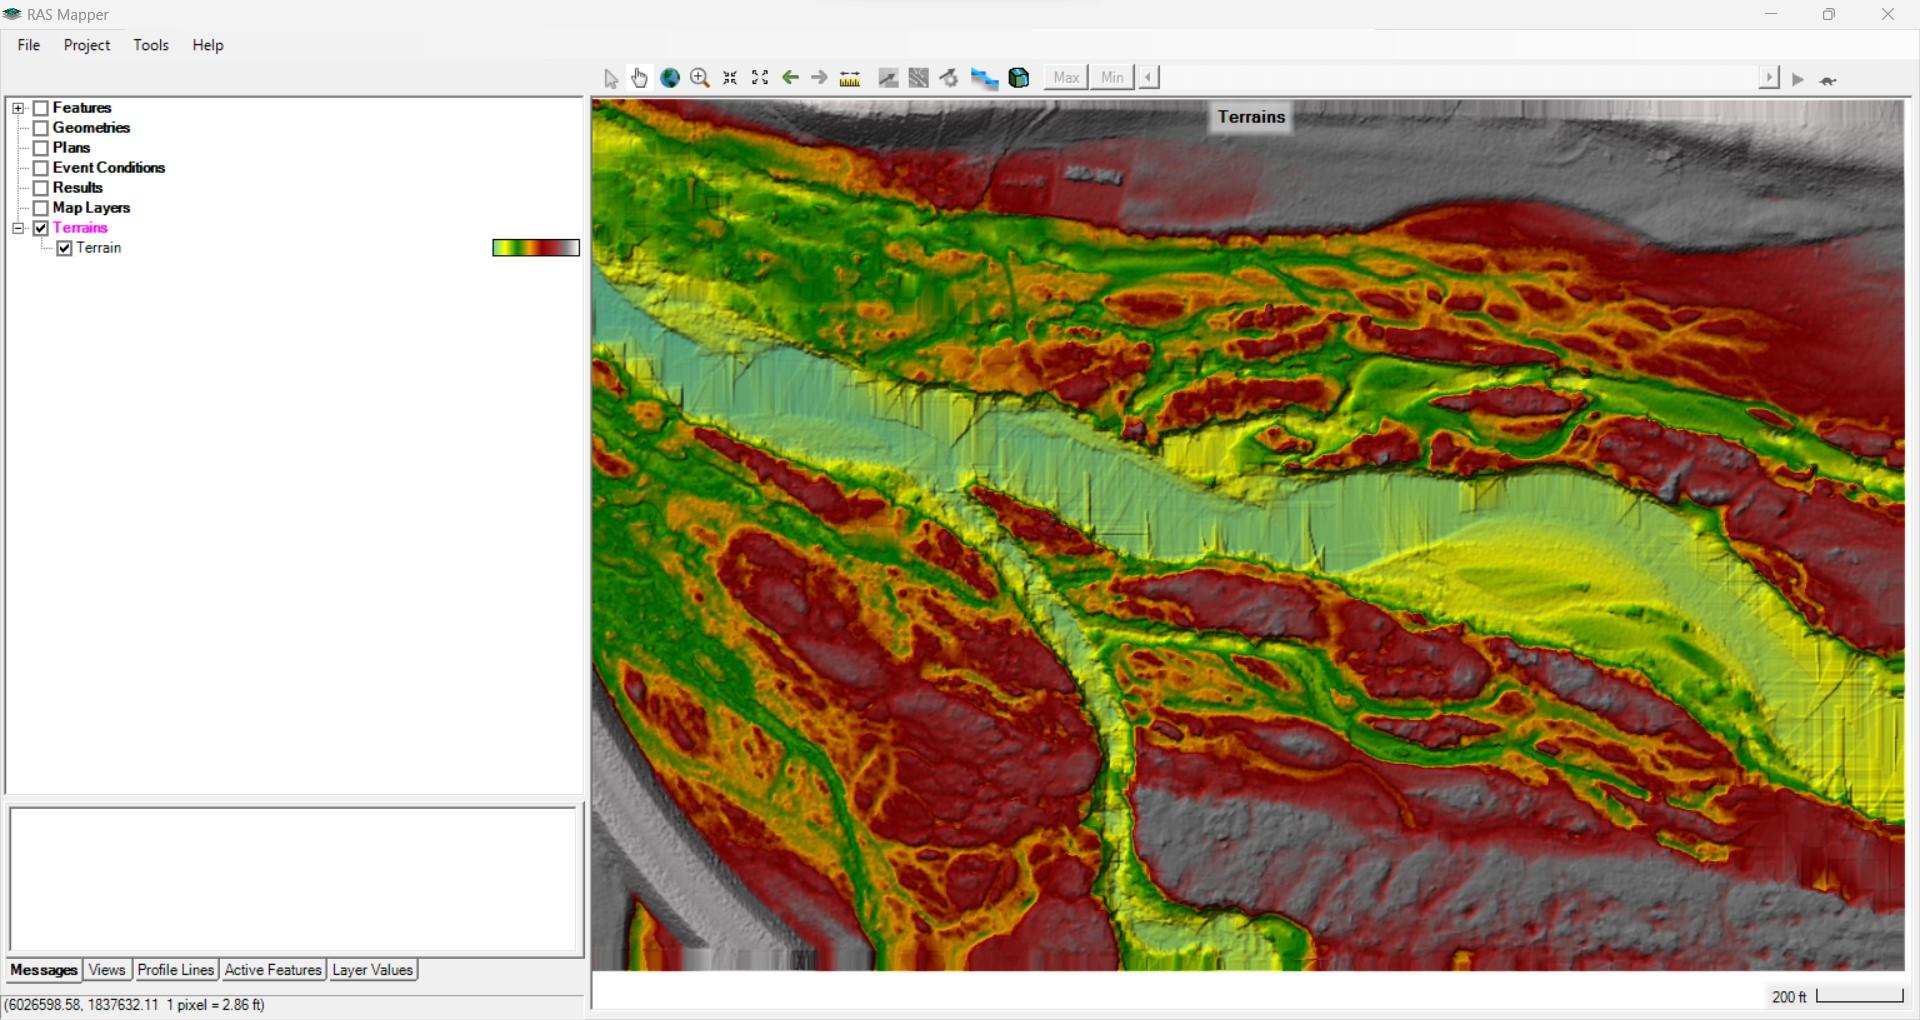
HEC RAS – DEM Imported into RAS Mapper under Terrain
