Tutorial: Create a DEM and Profile from an LAS File in ESRI ArcGIS Map
In this tutorial, you will learn how to use Equator to source a LiDAR point cloud, or LAZ file, then use ArcGIS Map to convert the LAZ file to an LAS file, create a digital elevation model (DEM) from the LAS file, and create a profile from the DEM.
Step 1: Source LiDAR Point Cloud
Step 2: Convert .laz to .las
Step 3: Create LAS Dataset file in ArcGIS
Step 4: Create DEM from LAS Dataset
Step 5: Create Hillshade from DEM
Step 6: Create Profile Graph
Video Tutorial of Creating a DEM and Profile from LAS File in ArcGIS Map
Step 1: Source LiDAR Point Cloud
If you already have a LiDAR Point Cloud, jump down to Step 2. If you need a LiDAR Point Cloud for your project site, follow these steps:
- Sign in or create an account with Equator
- Search for your site location by using the search bar or just zooming in
- Create a site boundary using the +NEW SITE button. Select from the default rectangle options or create your own site boundary. Don’t forget to name your site.
- Go to the Data tab and select point cloud from the LiDAR and LiDAR Derived products.
- The Generate Point Cloud menu will appear. Choose your site location and the source dataset, then select Generate.
- To download the LiDAR data as a .laz file, go to the Layers tab. Your point cloud layer will appear under the Site you just created. Select the download button (down arrow).
- The Customize Download menu will appear. Select your file format and coordinate system, then select Process.
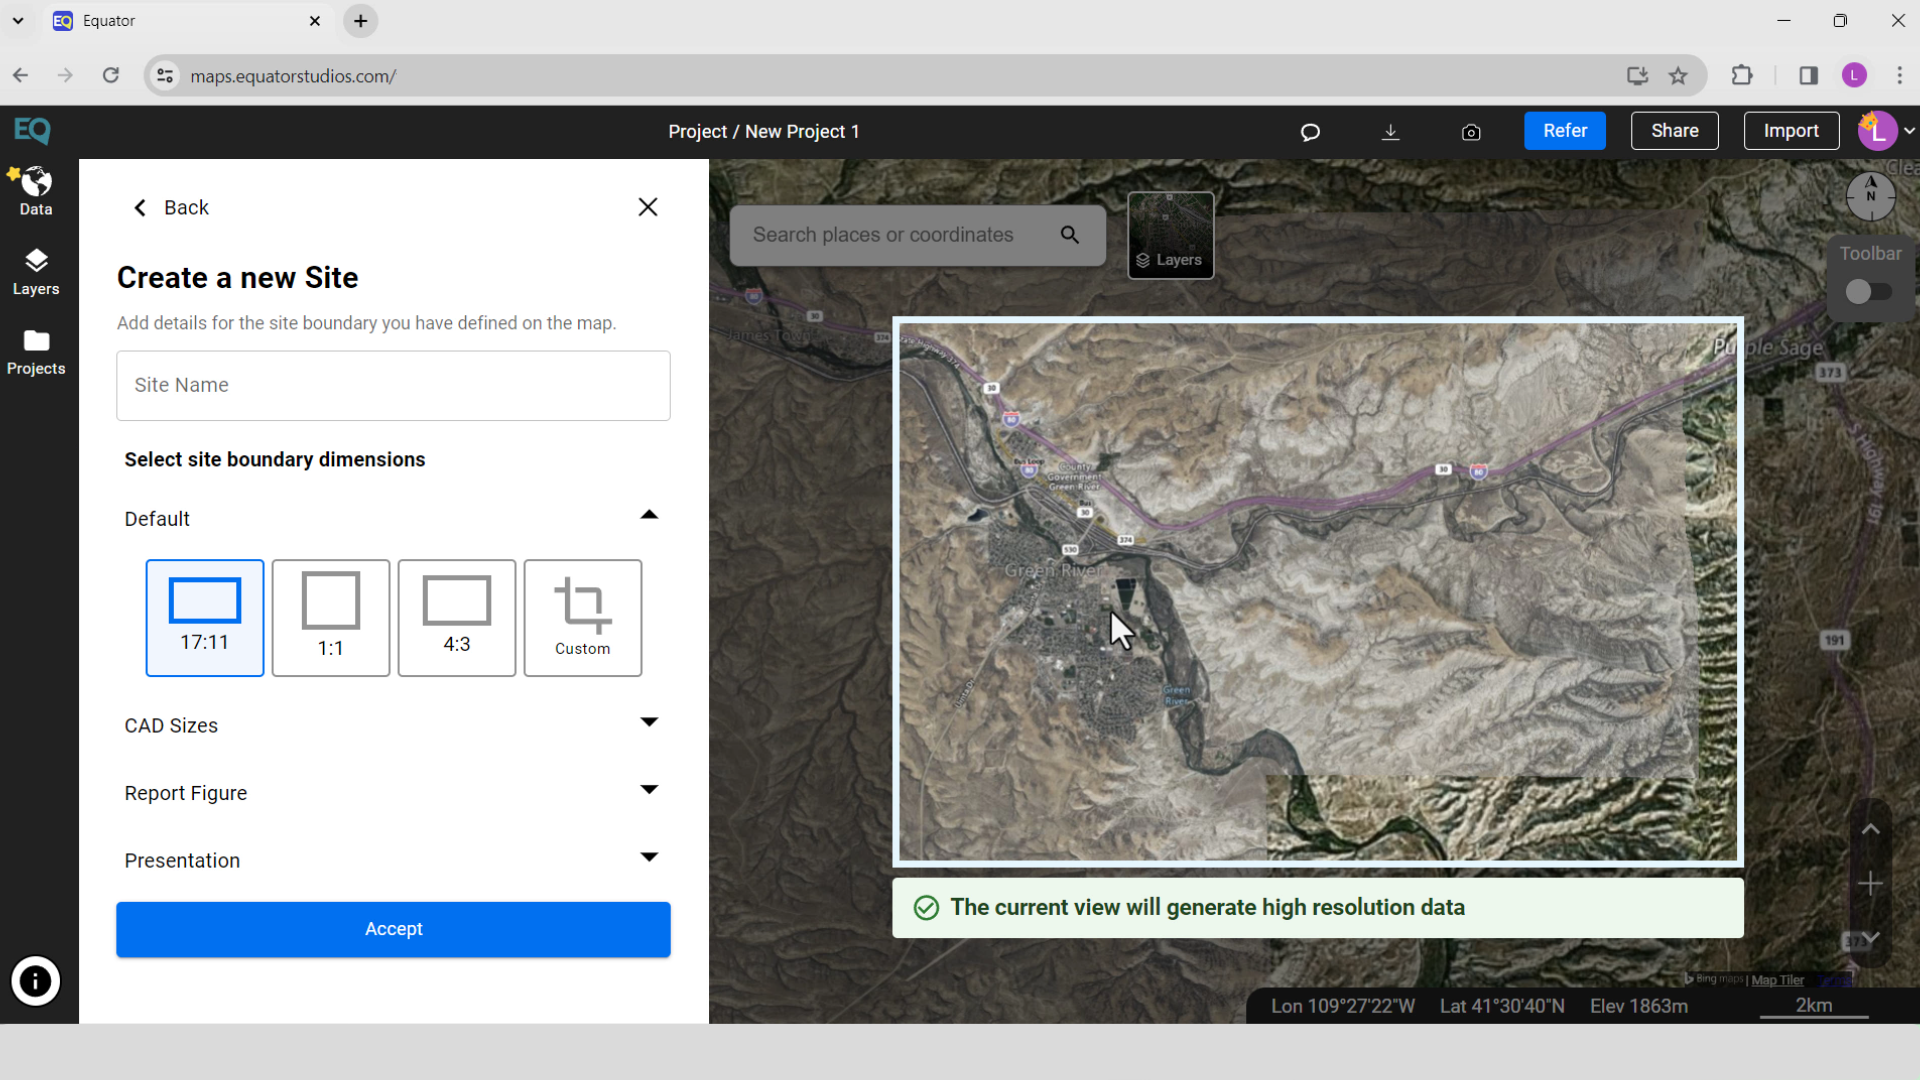
Create a New Site in Equator
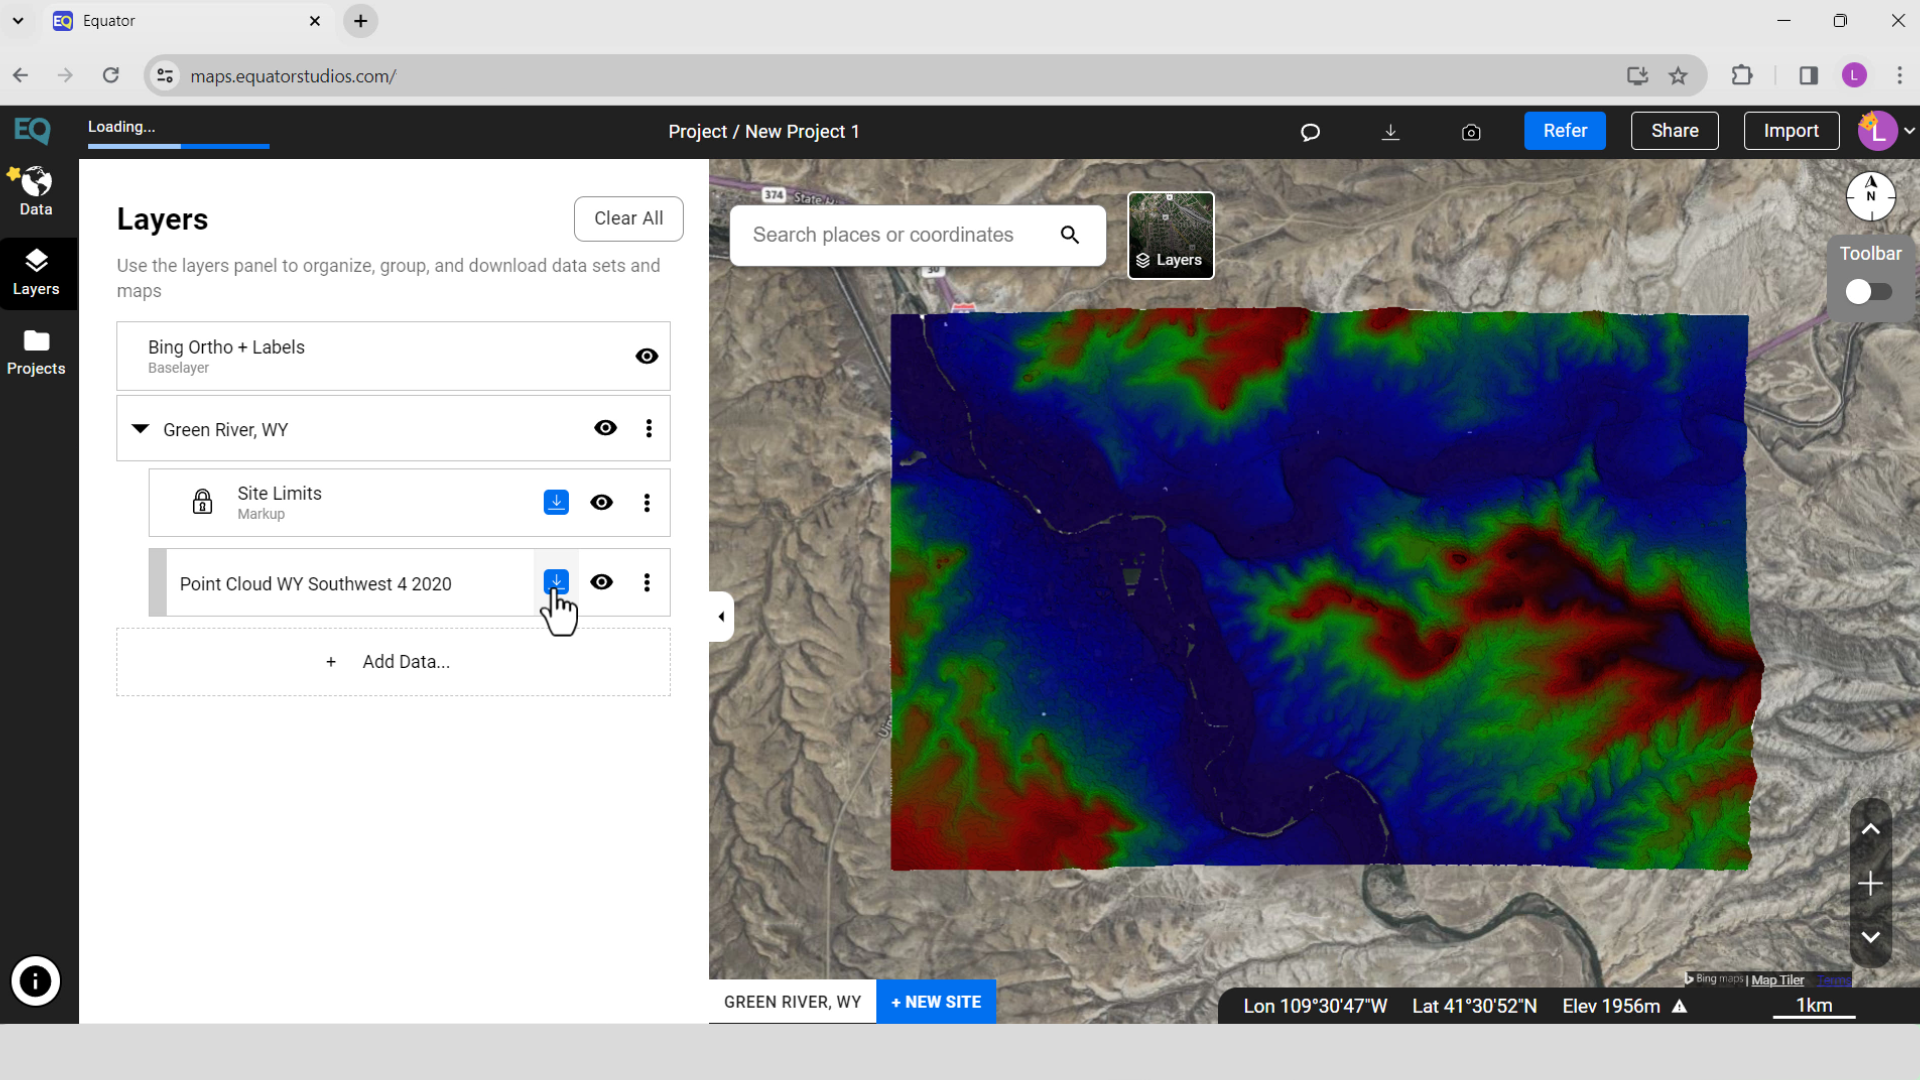
LiDAR Point Cloud Download from Equator
Step 2: Convert .LAZ to .LAS
In this step, use the LASTools Extension to convert the .laz file to a .las file.
- Download LASTools extension. Save it to your local drive and extract or unzip the file.
- Open ArcGIS ArcMap and if starting a new project, create a new folder
- Under ArcToolbox, go to Add Toolbox > Connect to Folder > Navigate to local folder > Select the LASTools (they have .tbx extension) > Click Open
- In the ArcToolbox, a new folder called LASTools will be created. Open this and select laszip.
- The laszip menu will appear. Enter the input .laz file (the file you downloaded from Equator) and where you would like the output .las file to be saved. Press okay.
Step 3: Create LAS Dataset File in ArcGIS
In this step, use the .las file to a LAS dataset file.
- Open the Catalog menu, click on your project to expand it, then right-click on the .lasd file and select Properties. The LAS Dataset Properties menu will pop up. Navigate to the LAS Files tab, click Add Files and select your .las files. Click okay and accept.
- Your point cloud will now appear in your layers menu and on your map.
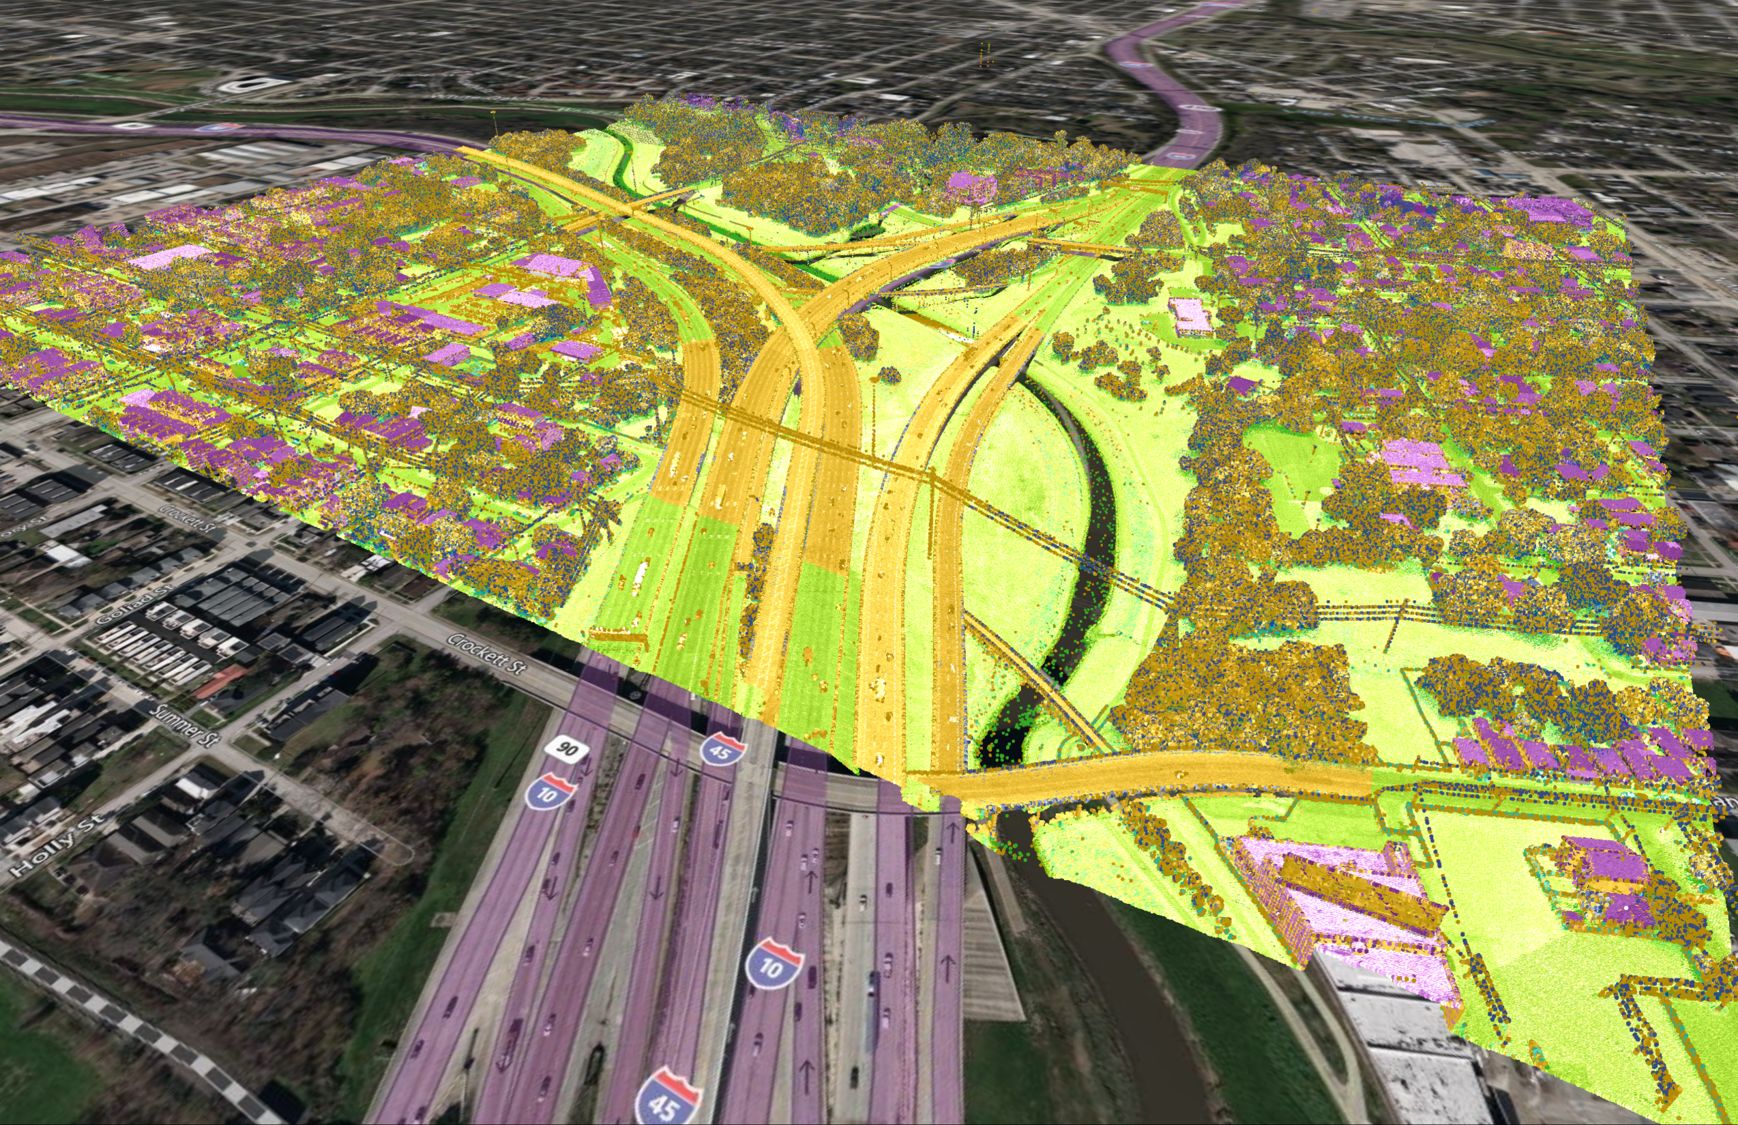
- If you open ArcScene, you can visualize the point cloud in 3D

Use ArcScene to visualize the point cloud in 3D and get a bird’s eye view
Step 4: Create DEM from LAS Dataset
In this step, use the LAS dataset file to create a digital elevation model (DEM).
- Open ArcToolbox, open Data Mangement Tools, select Layers and Table Views, then double click on Make LAS Dataset Layer
- The Make LAS Dataset Layer Menu will appear. Set your Input LAS Dataset to your newly created .lasd file. Name your output layer and set your Return Values to Last Return. Click ok.
- Open ArcToolbox, open Conversion Tools, open Raster, and select LAS Dataset to Raster.
- The LAS Dataset to Raster menu will appear. Set your Input LAS Dataset to the Dataset Layer that was just created, select the location and name of your output raster (use DEM in the name). Set the Sampling Value to 0.5. Set the Cell Assignment Type to IDW and Void Fill Method to Linear. Select OK to generate a DEM from the point cloud.
- The DEM will be created, saved in your Layers menu and appear on your map surface.
Step 5: Create Hillshade from DEM
In this step, use the DEM file to create a hillshade file.
-
Open ArcToolbox, open 3D Analyst Tools, open Raster Surface and select Hillshade.
- The Hillshade menu will appear. Make sure your input raster is the DEM you just created. Leave the remaining parameters as default. Select OK.
- Your Hillshade will be saved in your Layers menu and will appear on your map surface.
- In the Layers menu, right-click on the DEM.tif file and select Properties. The Layer Properties menu will appear. Go to the Symbology tab and change the colour ramp to one of your choosing. Go to the Display tab and change the transparency to 60%. Press Apply and Accept.

Create a DEM from an LASD file using the LAS Dataset to Raster Tool

Change the colour ramp and transparency of the DEM
Step 6: Create Profile Graph
In this step, use the 3D Analyst Extension to create a profile graph.
-
Select the 3D Analyst toolbar. Change the layer in the toolbar to the DEM file. Select the Interpolate Line button and digitize or draw the line in which you would like the profile graph to be along. When you are done adding vertices to the line, double click to stop digitizing.
- Once your line is drawn, select the Profile Graph from the 3D Analyst toolbar. The Profile Graph will appear.
- Click on the title of the graph and the Graph Properties of Profile Graph Title will appear. Change the Title and Footer text. Press Apply, then Accept.
- To export the profile, right-click on the profile and select Export. The Export menu will appear. Choose if you’d like to export as a picture, the native file, or just the data and file extension. Name it and press Save.

Use Interpolate Line button in the 3D Analyst Toolbar

Create a Profile from the DEM created from the LAZ file